
Small kitchen got you feeling cramped? These genius designs prove you don’t need square footage to have a kitchen that works (and looks) incredible. Get ready to rethink every inch of your compact cooking space.
1. Vertical Storage Gallery Wall Kitchen
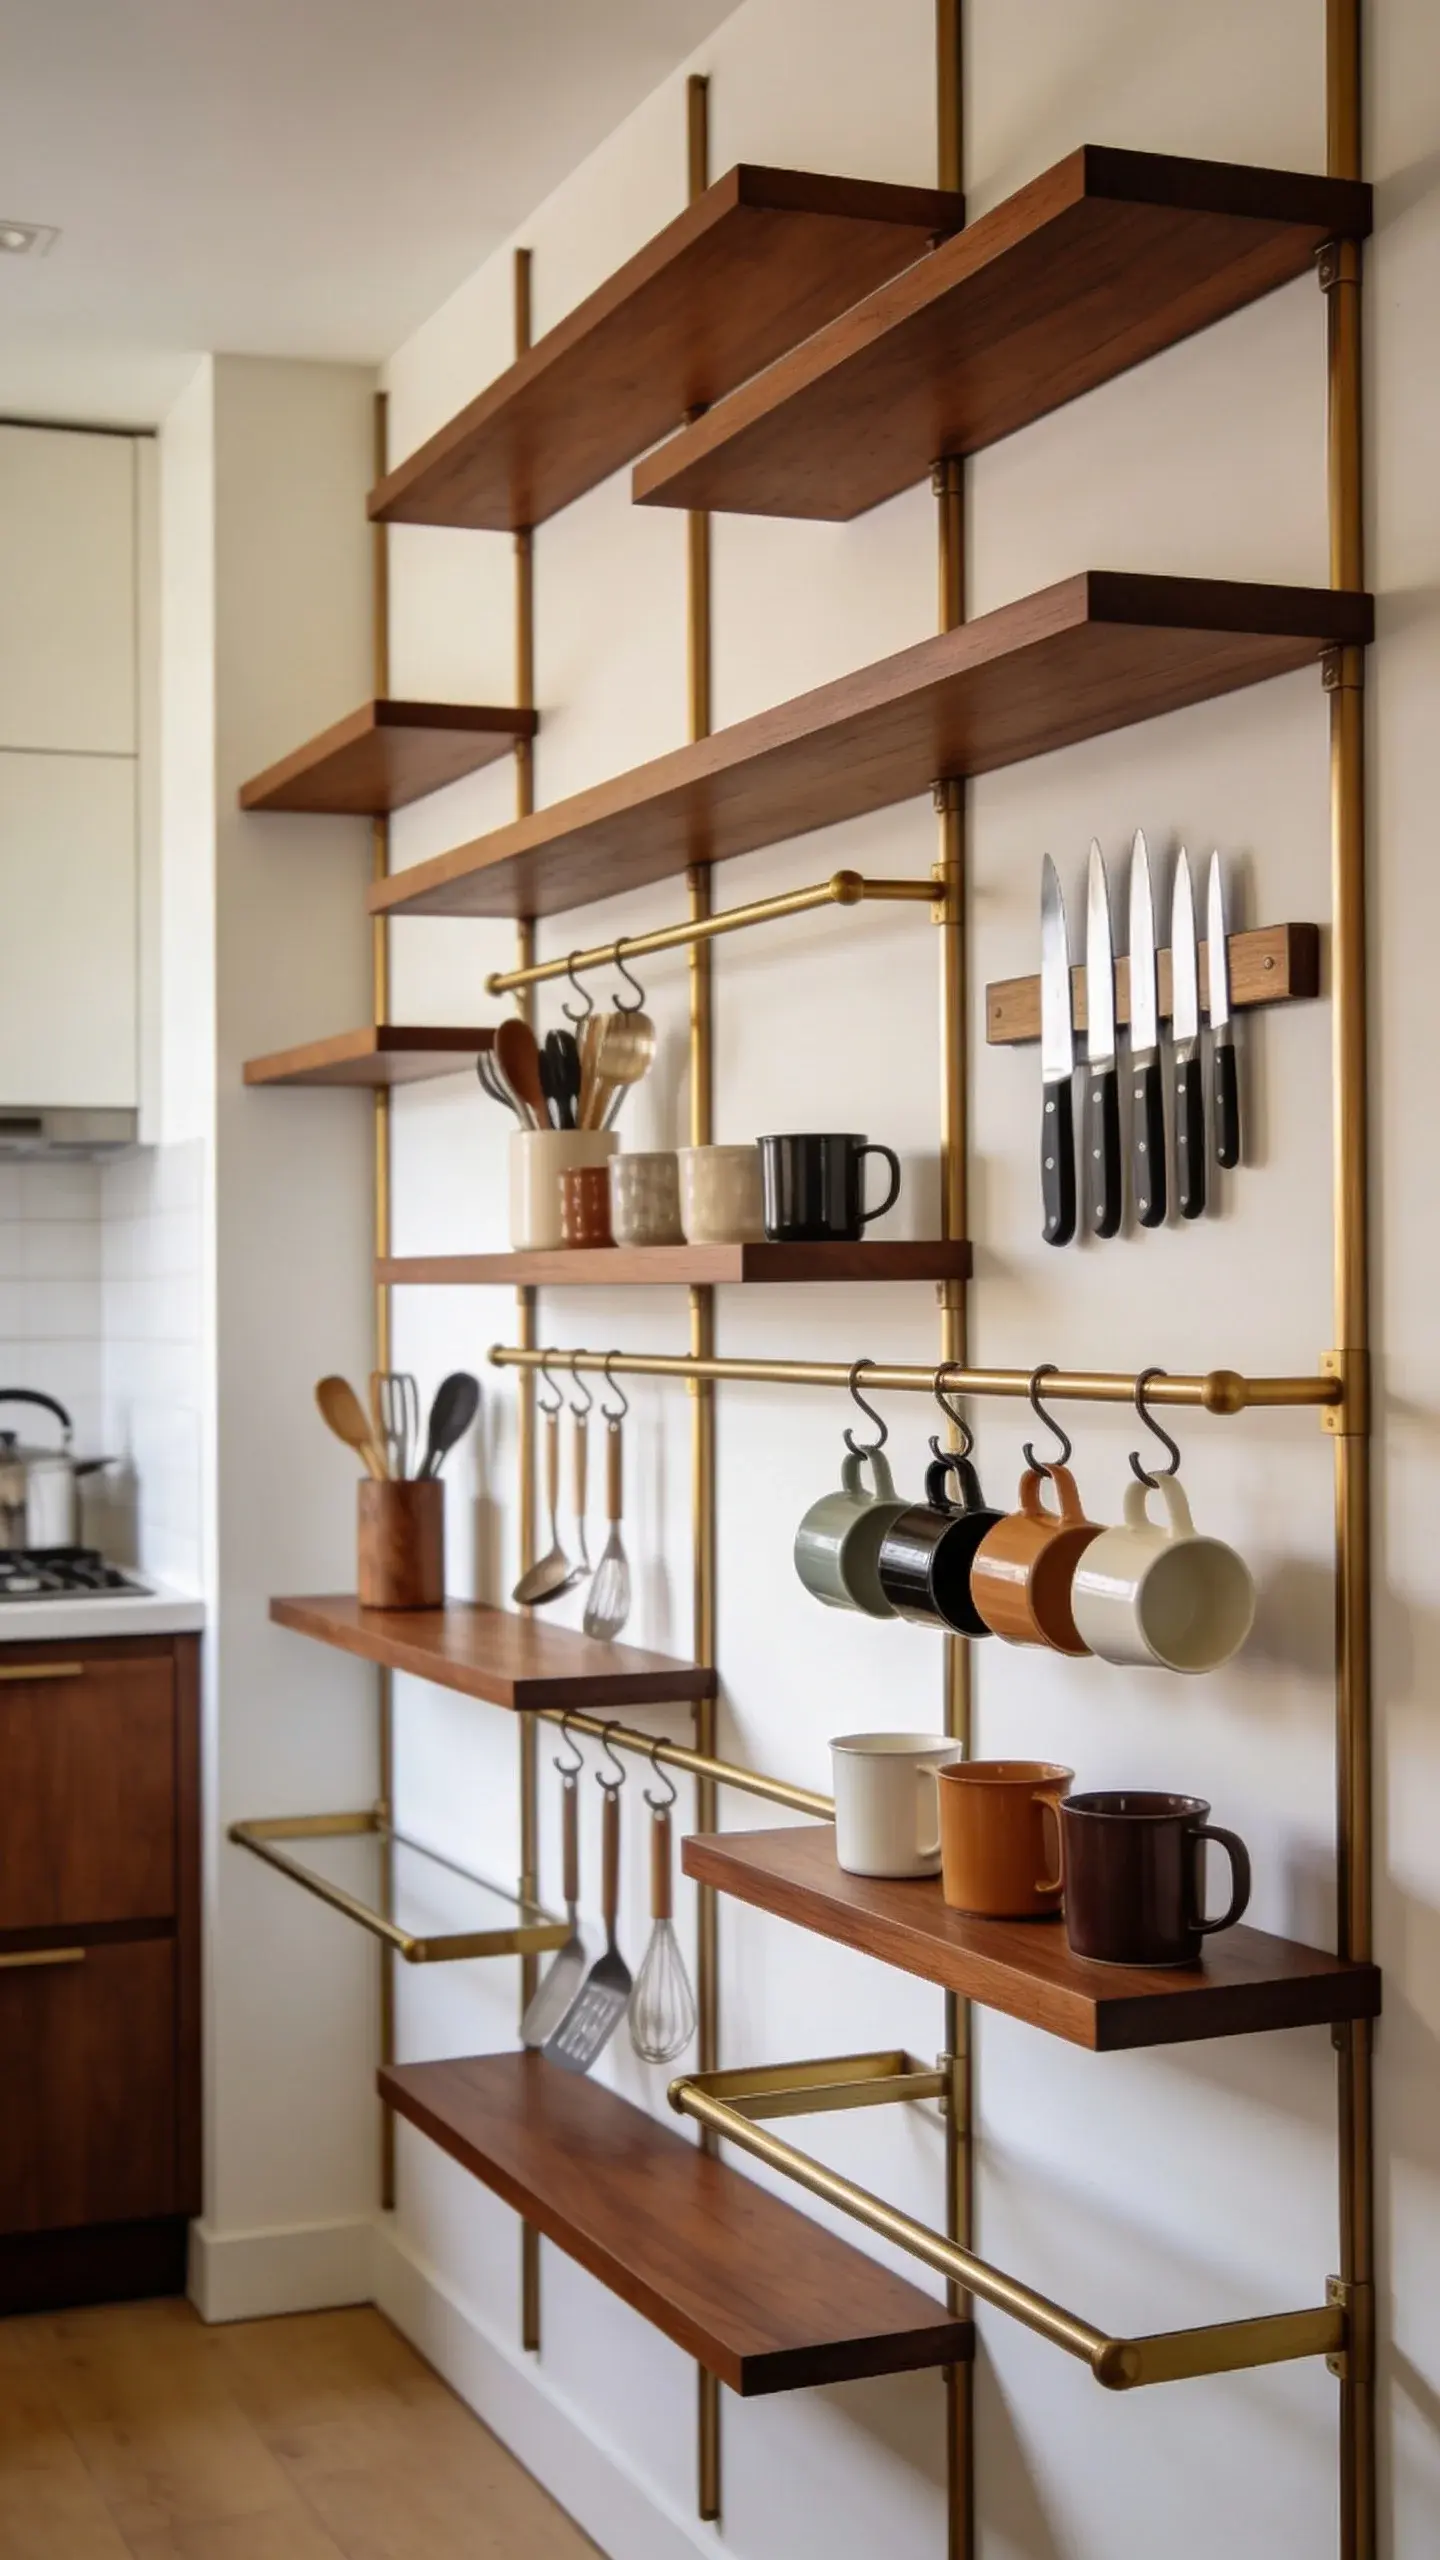
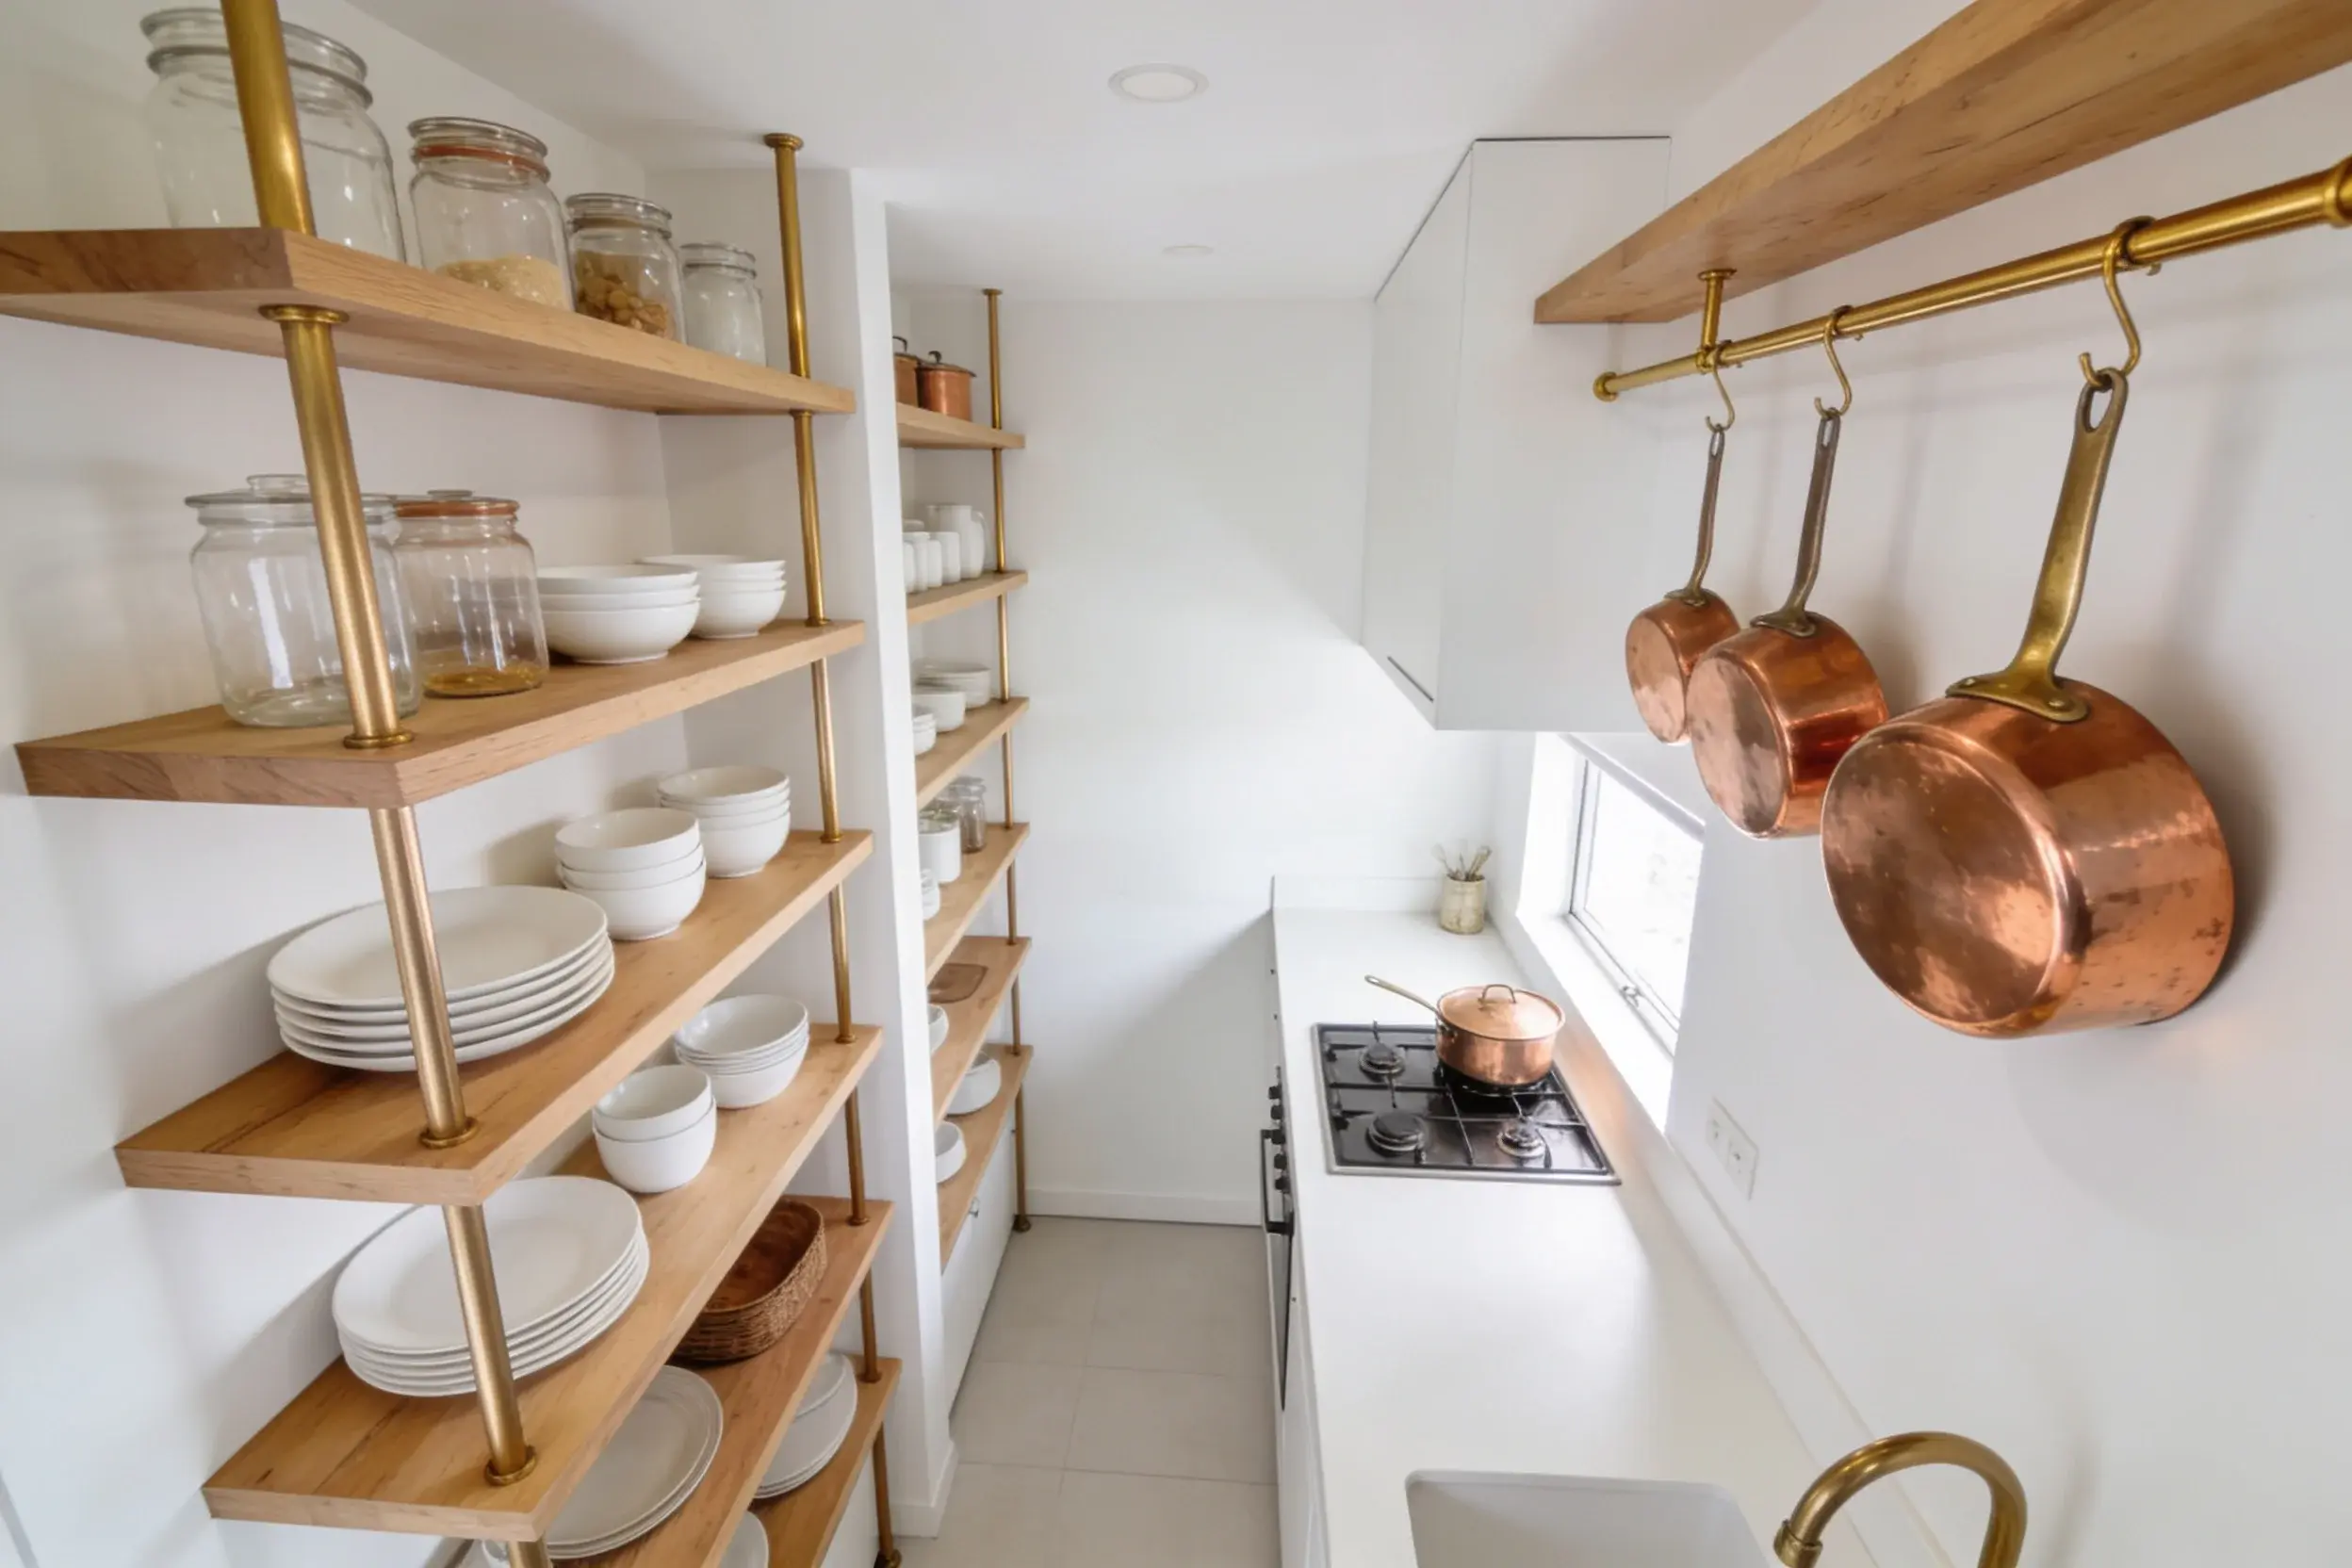
Who says your walls can’t work overtime? This design turns every vertical surface into functional storage that doubles as art. Open shelving, magnetic knife strips, and hanging rail systems create a working kitchen that feels like a curated display.
Start with floating wooden shelves in a warm oak or walnut tone, stacked floor to ceiling on at least one wall. Add brass hanging rods beneath the shelves for S-hooks that hold everything from mugs to utensils. The key here is keeping items color-coordinated and intentionally displayed—think matching glass jars for dry goods, uniform white dishware, and copper pots worth showing off.
Essential Elements:
- Floor-to-ceiling open shelving in natural wood
- Magnetic wall strips for knives and metal tools
- Brass or black hanging rod systems with S-hooks
- Matching glass storage containers and ceramic canisters
This works beautifully for people who actually use their kitchen daily and want their tools within arm’s reach. Just commit to keeping things tidy—this isn’t a hide-the-mess situation.
2. Scandinavian Minimalist White-on-White
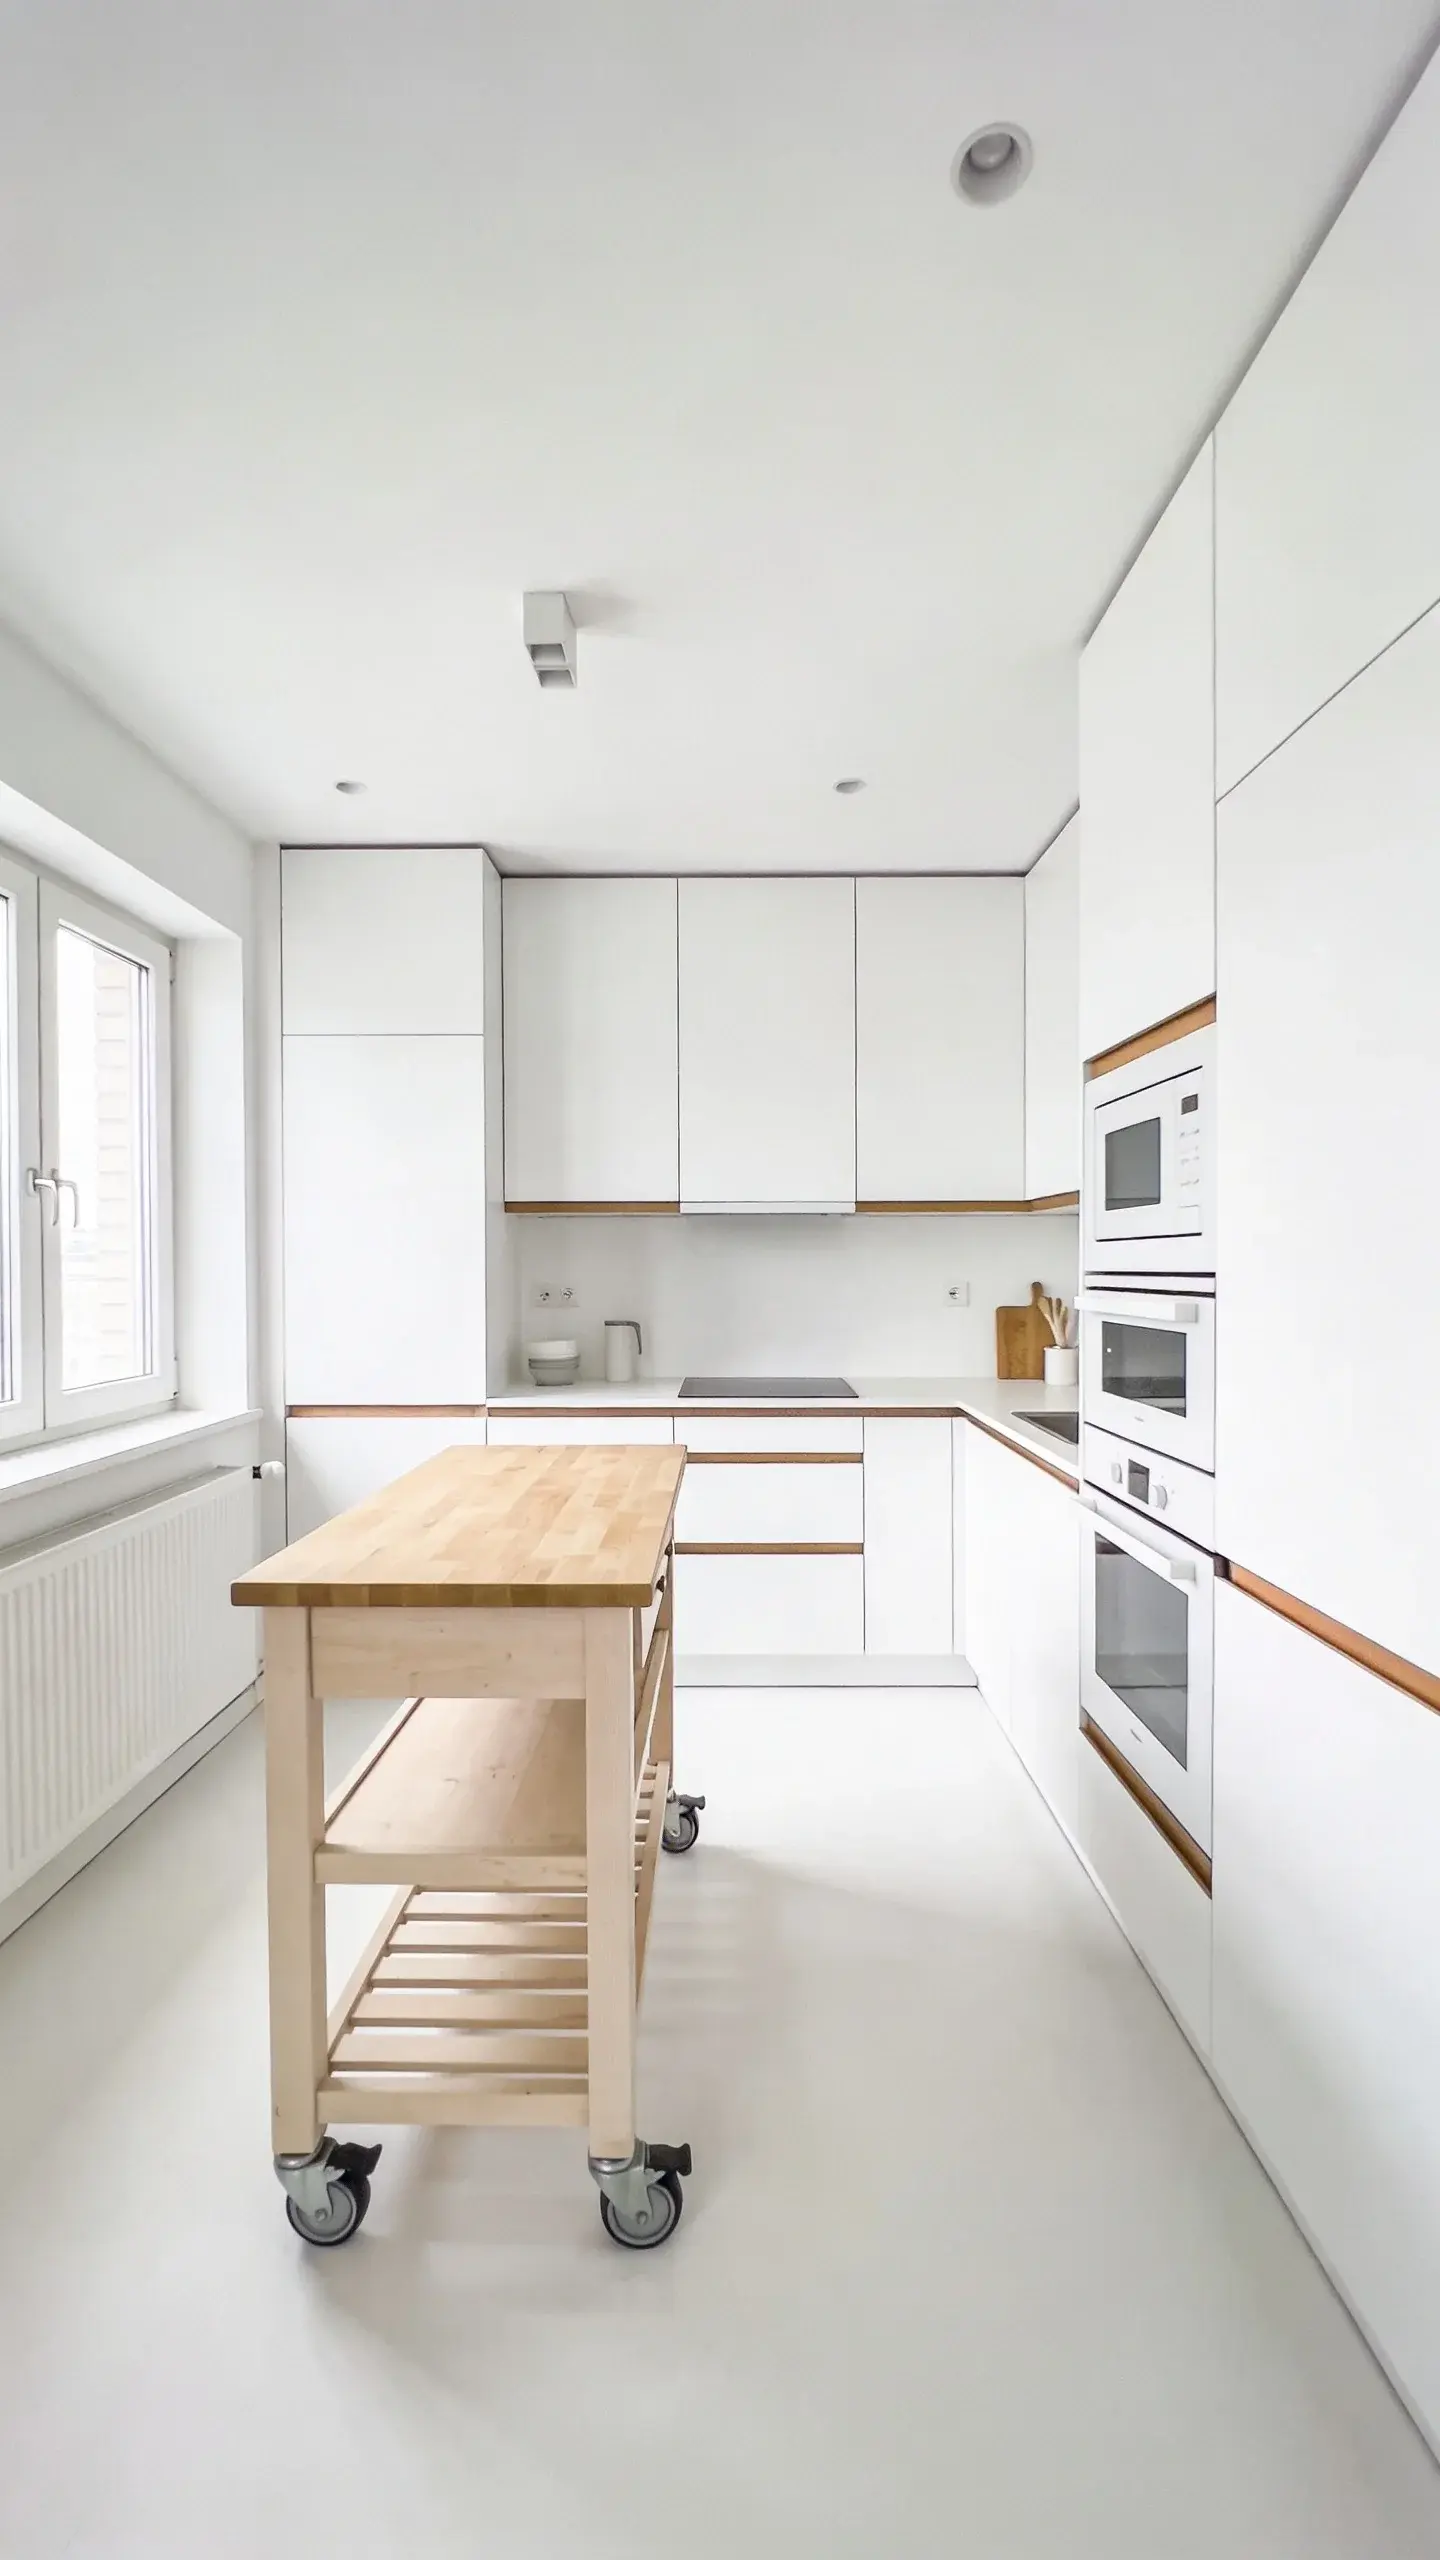
Clean lines meet ultimate functionality in this bright, airy approach. The all-white palette makes even the tiniest kitchen feel twice its actual size, while natural wood accents keep it from feeling sterile.
Paint everything—cabinets, walls, even the ceiling—in the same crisp white. Choose handle-less cabinet fronts with push-to-open mechanisms for seamless surfaces. Add a light wood butcher block countertop or a small mobile island in birch or beech. Keep appliances minimal and integrated, hiding your fridge behind cabinet panels if possible.
Styling Details:
- White subway tile backsplash with minimal grout lines
- Single wood cutting board displayed against the backsplash
- One green plant (pothos or snake plant) for life
- Brushed nickel or matte black minimal hardware
Perfect for anyone who finds peace in simplicity and wants their kitchen to disappear into the background when not in use. Seriously calming vibes.
3. Industrial Chic With Exposed Everything
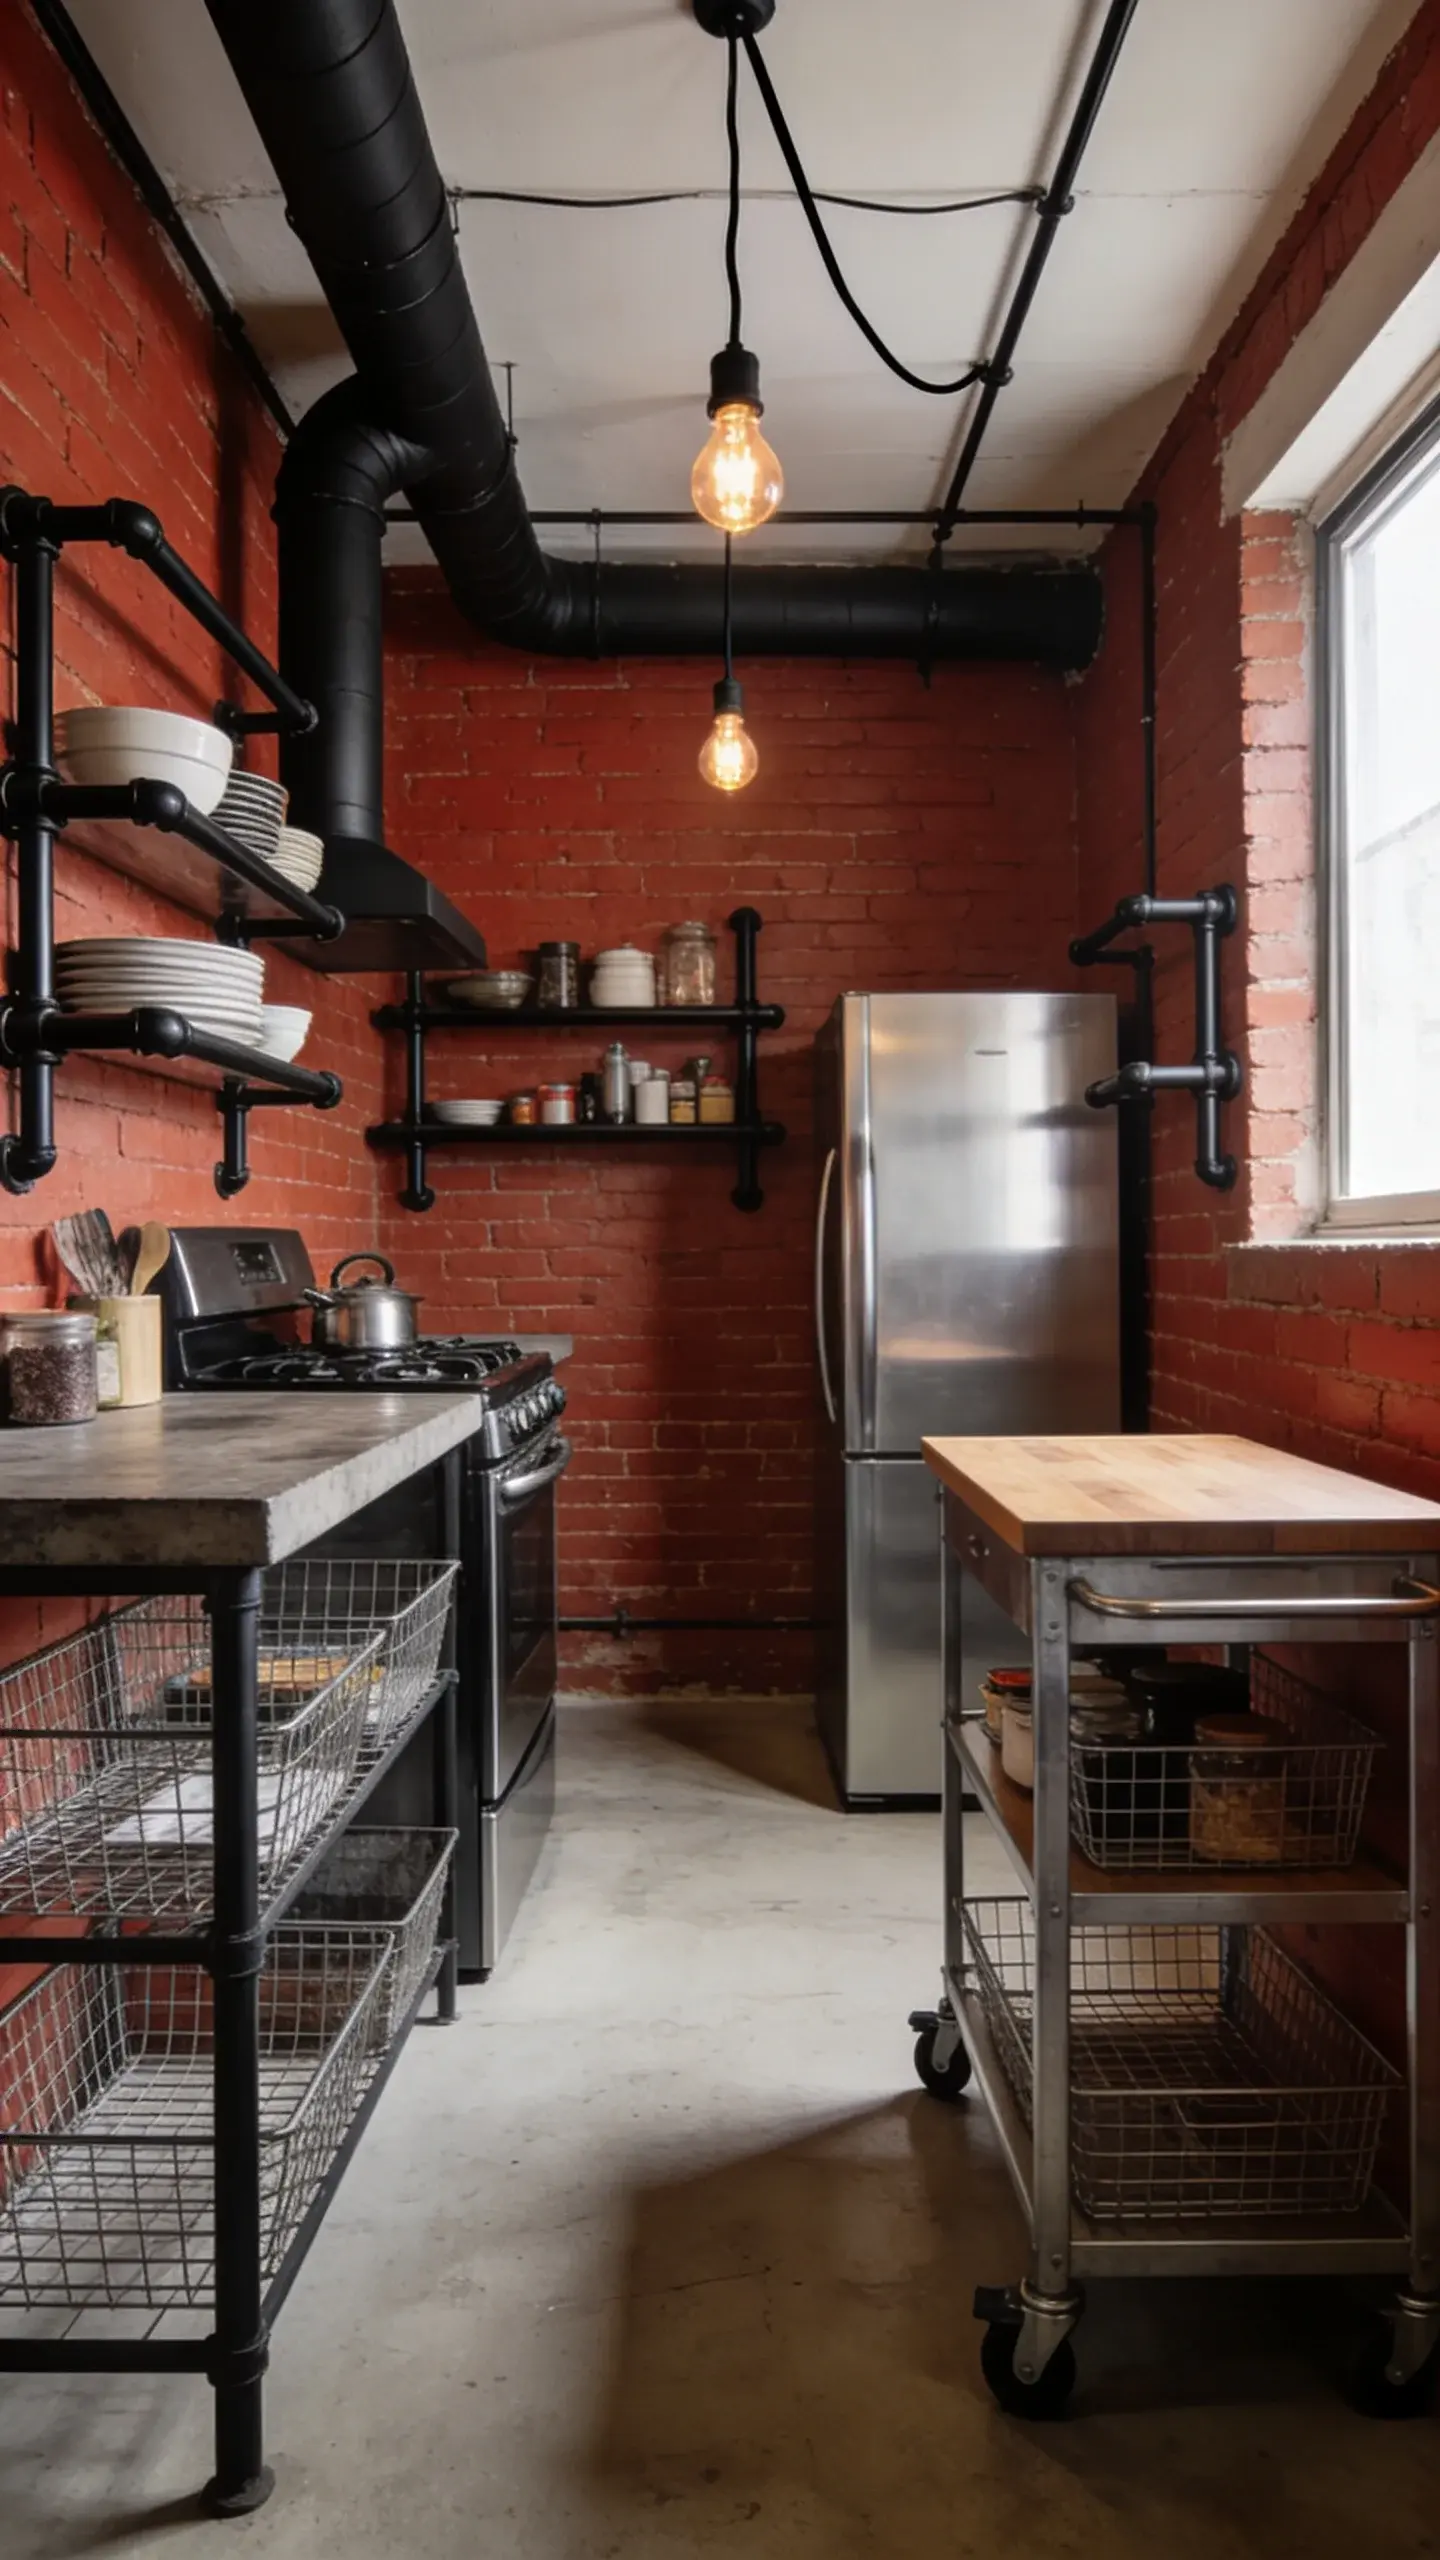
Embrace the urban loft aesthetic by celebrating exposed pipes, brick, and metal. This design leans into your studio’s existing bones rather than fighting them, turning architectural “flaws” into features.
Leave that brick wall exposed (or add brick-look panels if you’re not blessed with the real thing). Install black metal pipe shelving for an industrial edge that holds serious weight. Choose stainless steel appliances and open wire baskets for storage. A rolling metal cart serves as both prep space and mobile storage that tucks away when you need floor space.
Key Materials:
- Exposed brick or concrete walls
- Black metal pipe shelving and pot racks
- Edison bulb pendant lights on fabric cords
- Stainless steel or concrete countertops
- Metal wire baskets and vintage enamelware
This look works for anyone who wants their kitchen to feel like a Brooklyn loft circa 2015. Still cool, trust me.
4. Hidden Kitchen Behind Sliding Barn Doors
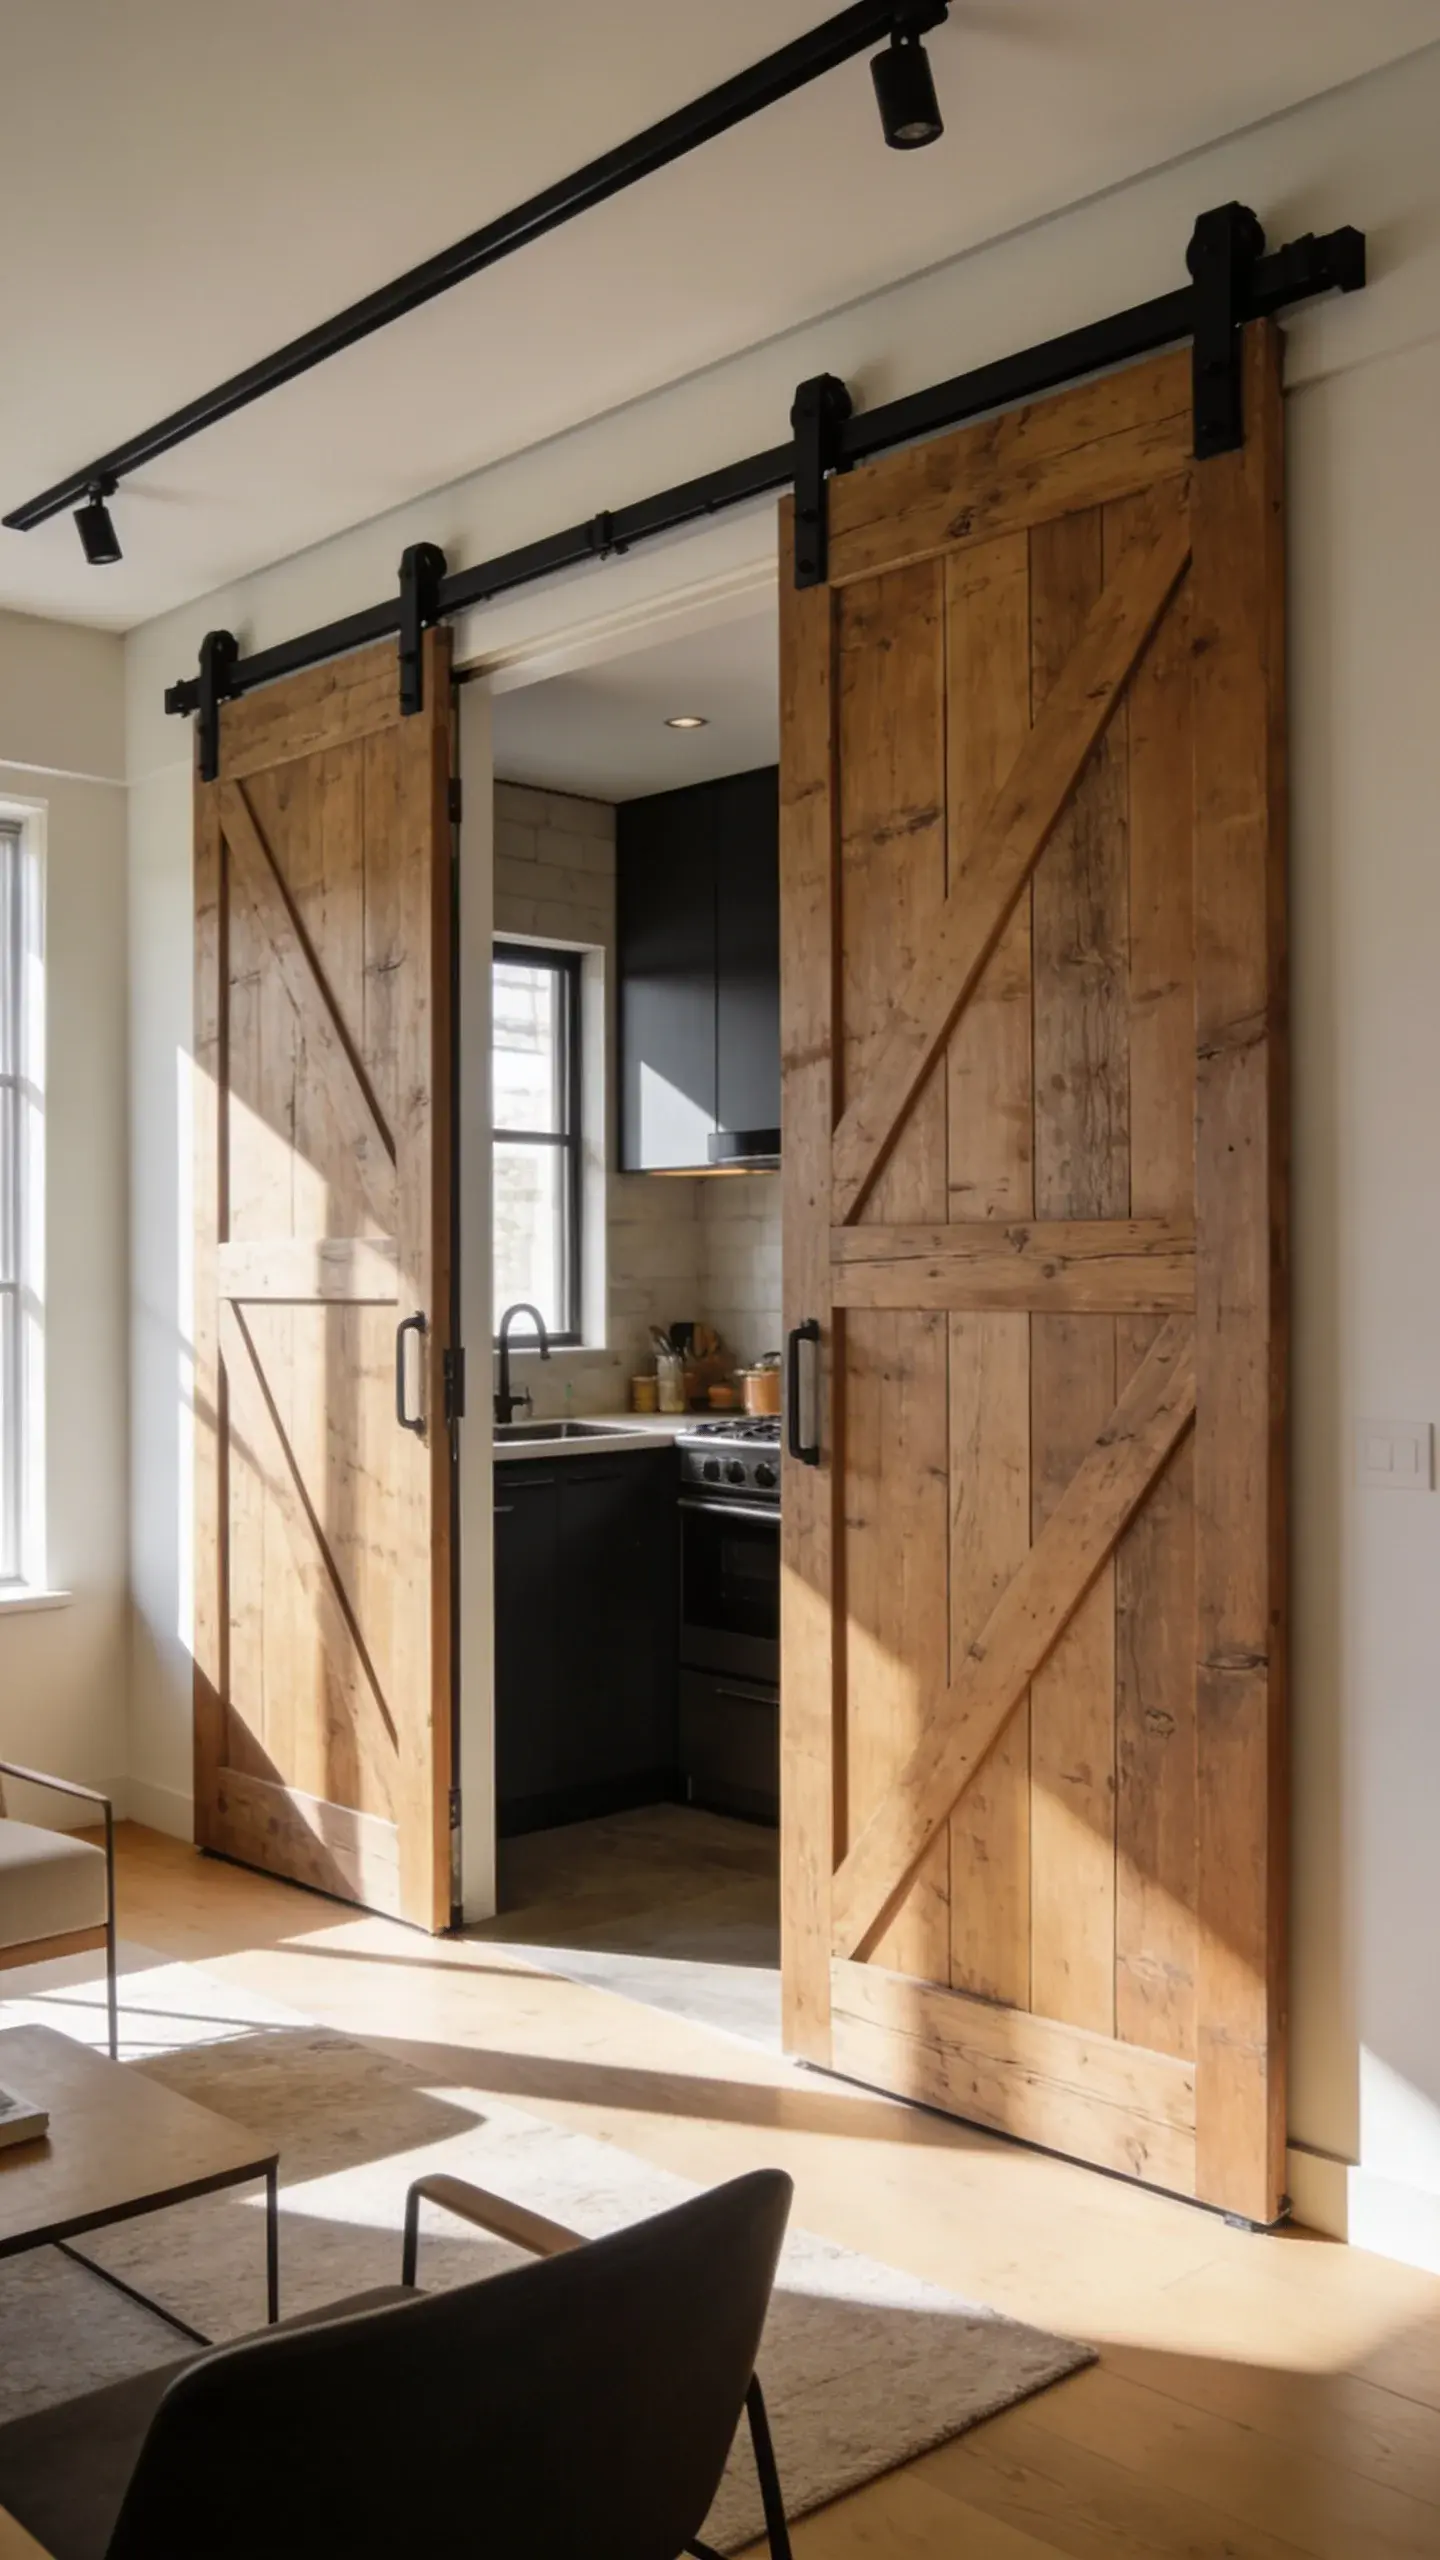
Here’s a genius move: make your entire kitchen disappear when you’re not cooking. Oversized sliding barn doors on a ceiling-mounted track close off your kitchen completely, turning your studio into a one-room wonder with zero kitchen in sight.
Install full-height barn doors (or even accordion-style doors) that span your entire kitchen area. Paint them to match your walls for seamless integration, or make them a statement piece in deep charcoal or natural reclaimed wood. Inside the hidden zone, organize everything vertically with pull-out pantries, hanging storage, and magnetic strips. Since guests won’t see this space, you can prioritize function over aesthetics.
When you’re entertaining or just want to forget about dirty dishes, slide those doors closed and enjoy a kitchen-free living space. Game-changer for studio dwellers who hate staring at their mess while watching TV.
5. Pegboard Organization Station
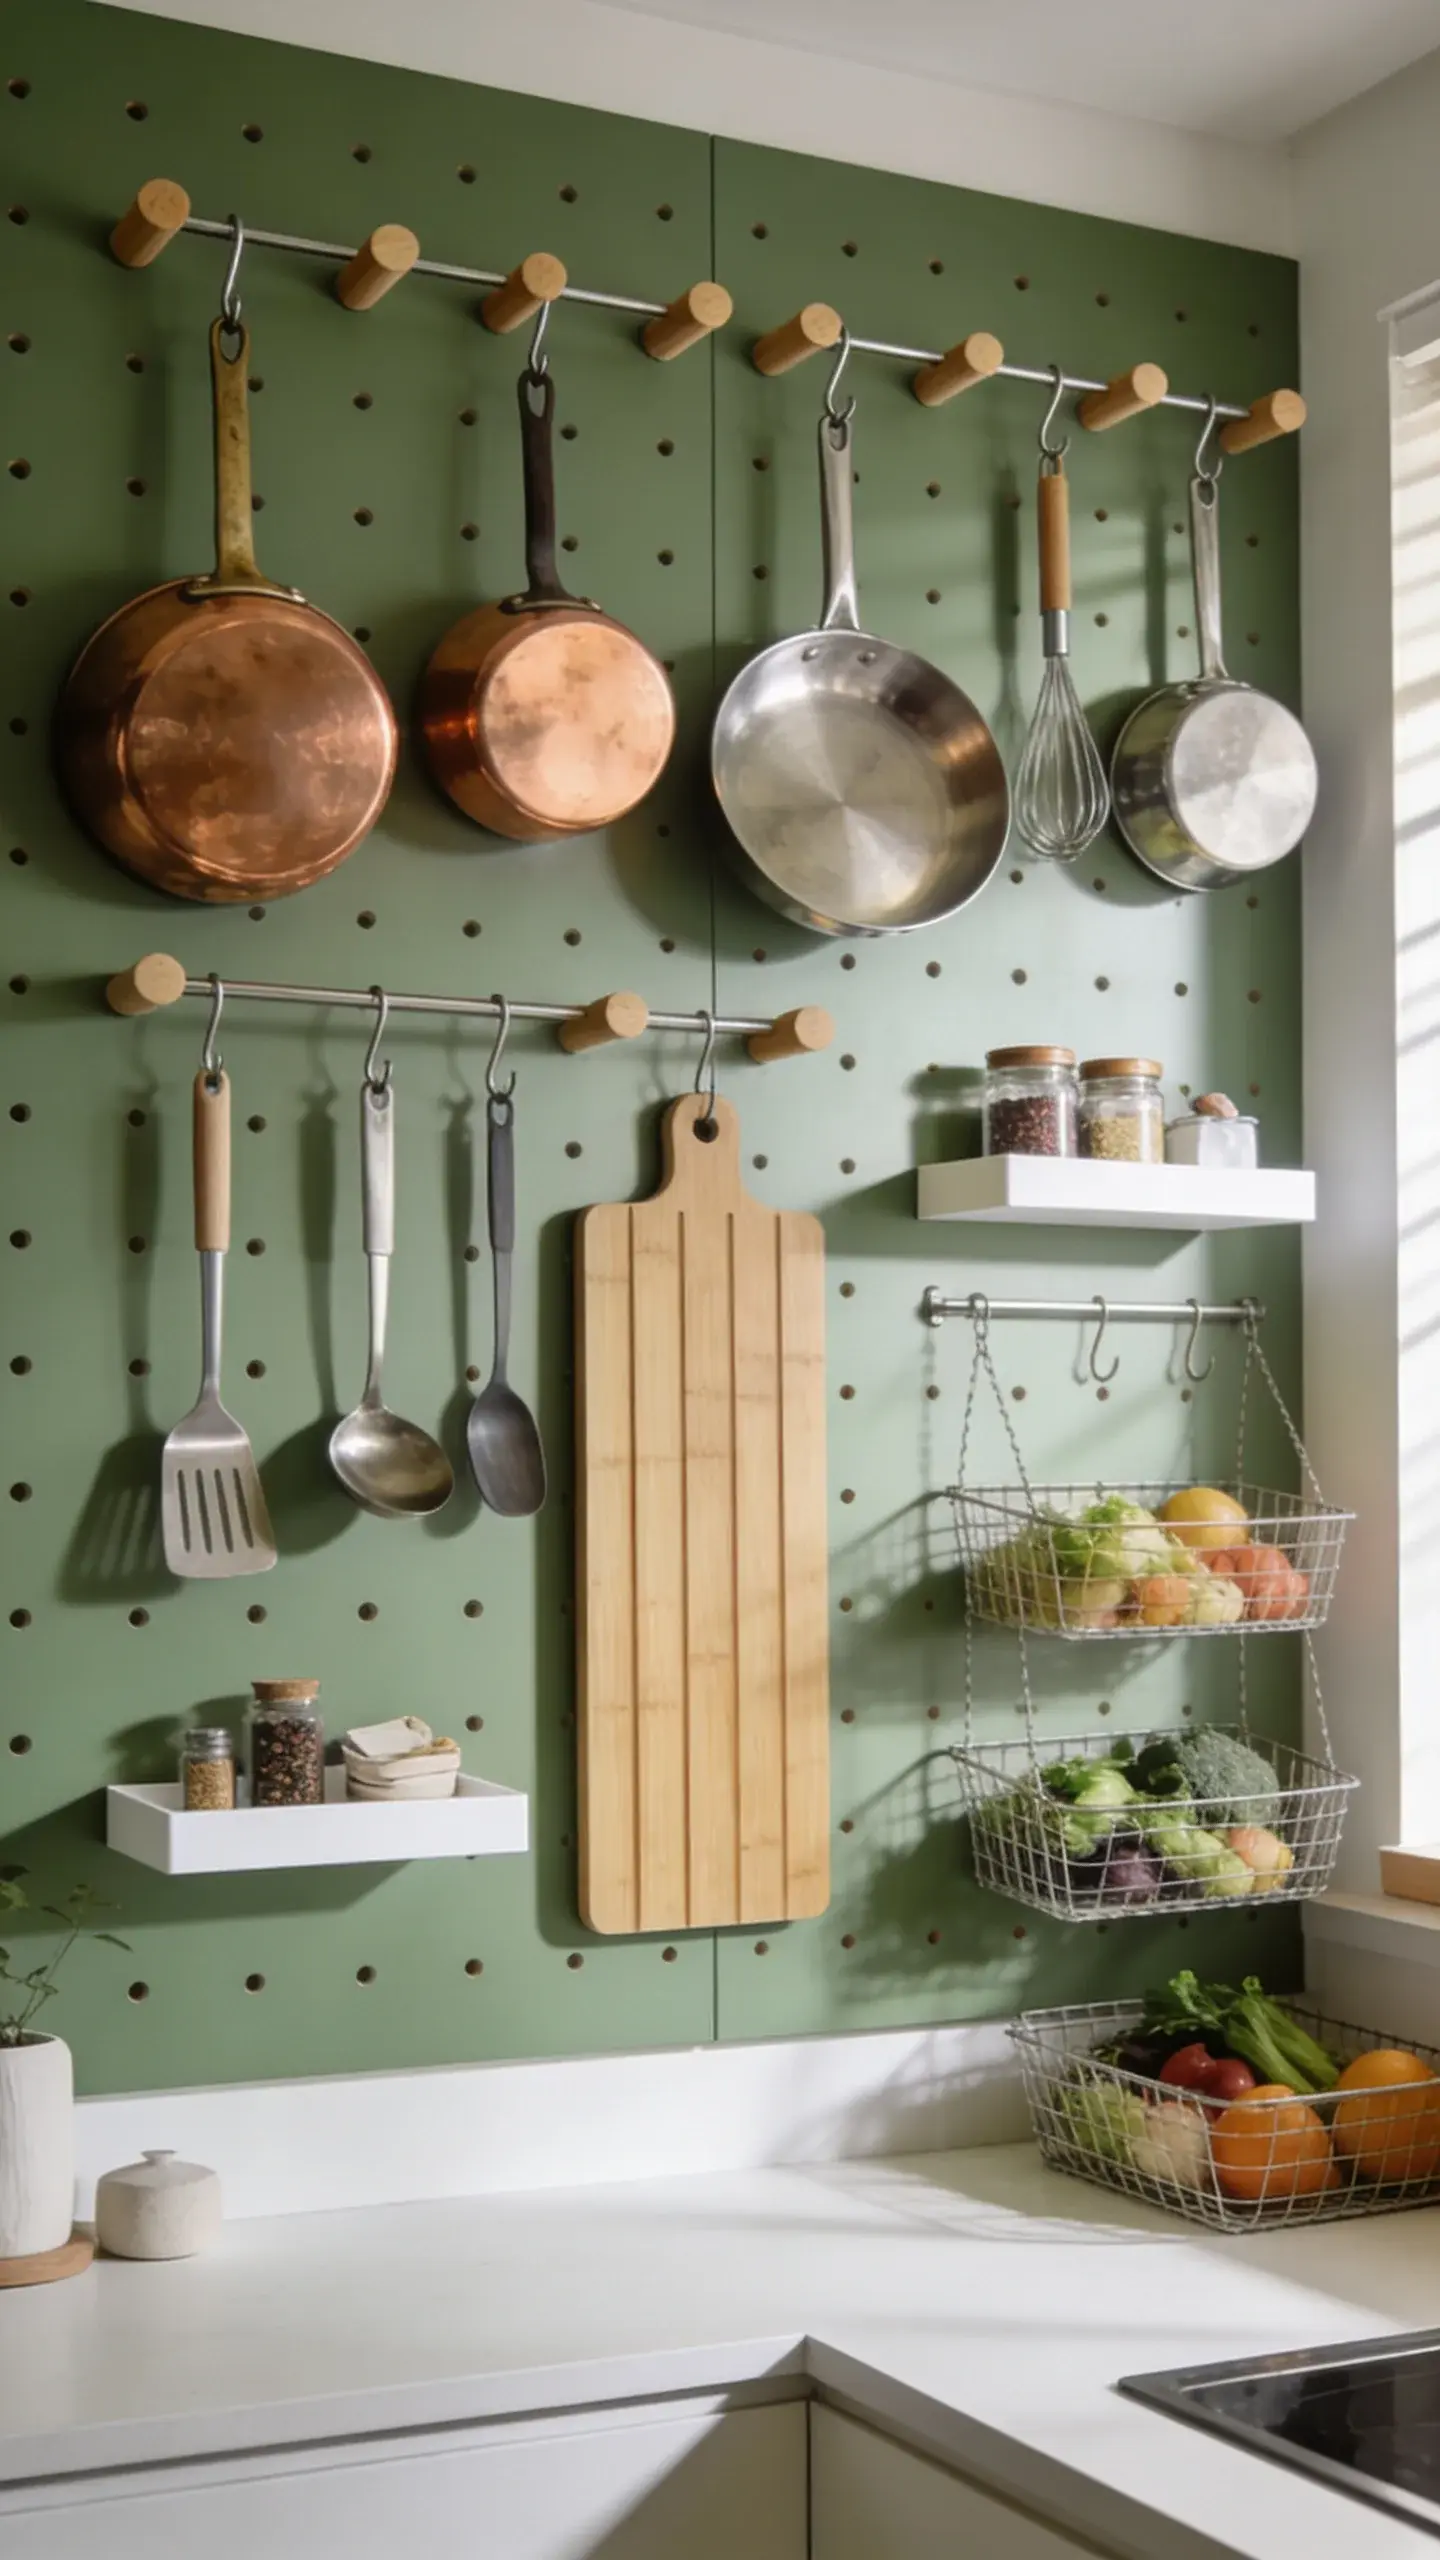
Transform an entire wall into customizable storage heaven with pegboard panels. This design gives you ultimate flexibility to rearrange hooks, shelves, and baskets whenever your needs change—no new drill holes required.
Mount large pegboard panels (painted in a fun color like sage green, dusty rose, or classic white) across your largest wall section. Use a mix of wooden pegs, metal hooks, and small shelves designed for pegboard systems. Hang pots, pans, utensils, cutting boards, and even small plants. Add tiny baskets for garlic and onions, and use S-hooks for mugs.
Layout Tips:
- Group items by function (cooking tools together, coffee station together)
- Paint the pegboard a color that complements your cabinets
- Mix wooden and metal accessories for visual interest
- Leave some empty space—don’t fill every hole
Perfect for renters who can’t install permanent shelving or anyone who loves reorganizing their space regularly. FYI, it’s also ridiculously photogenic.
6. Under-Counter Everything Compact
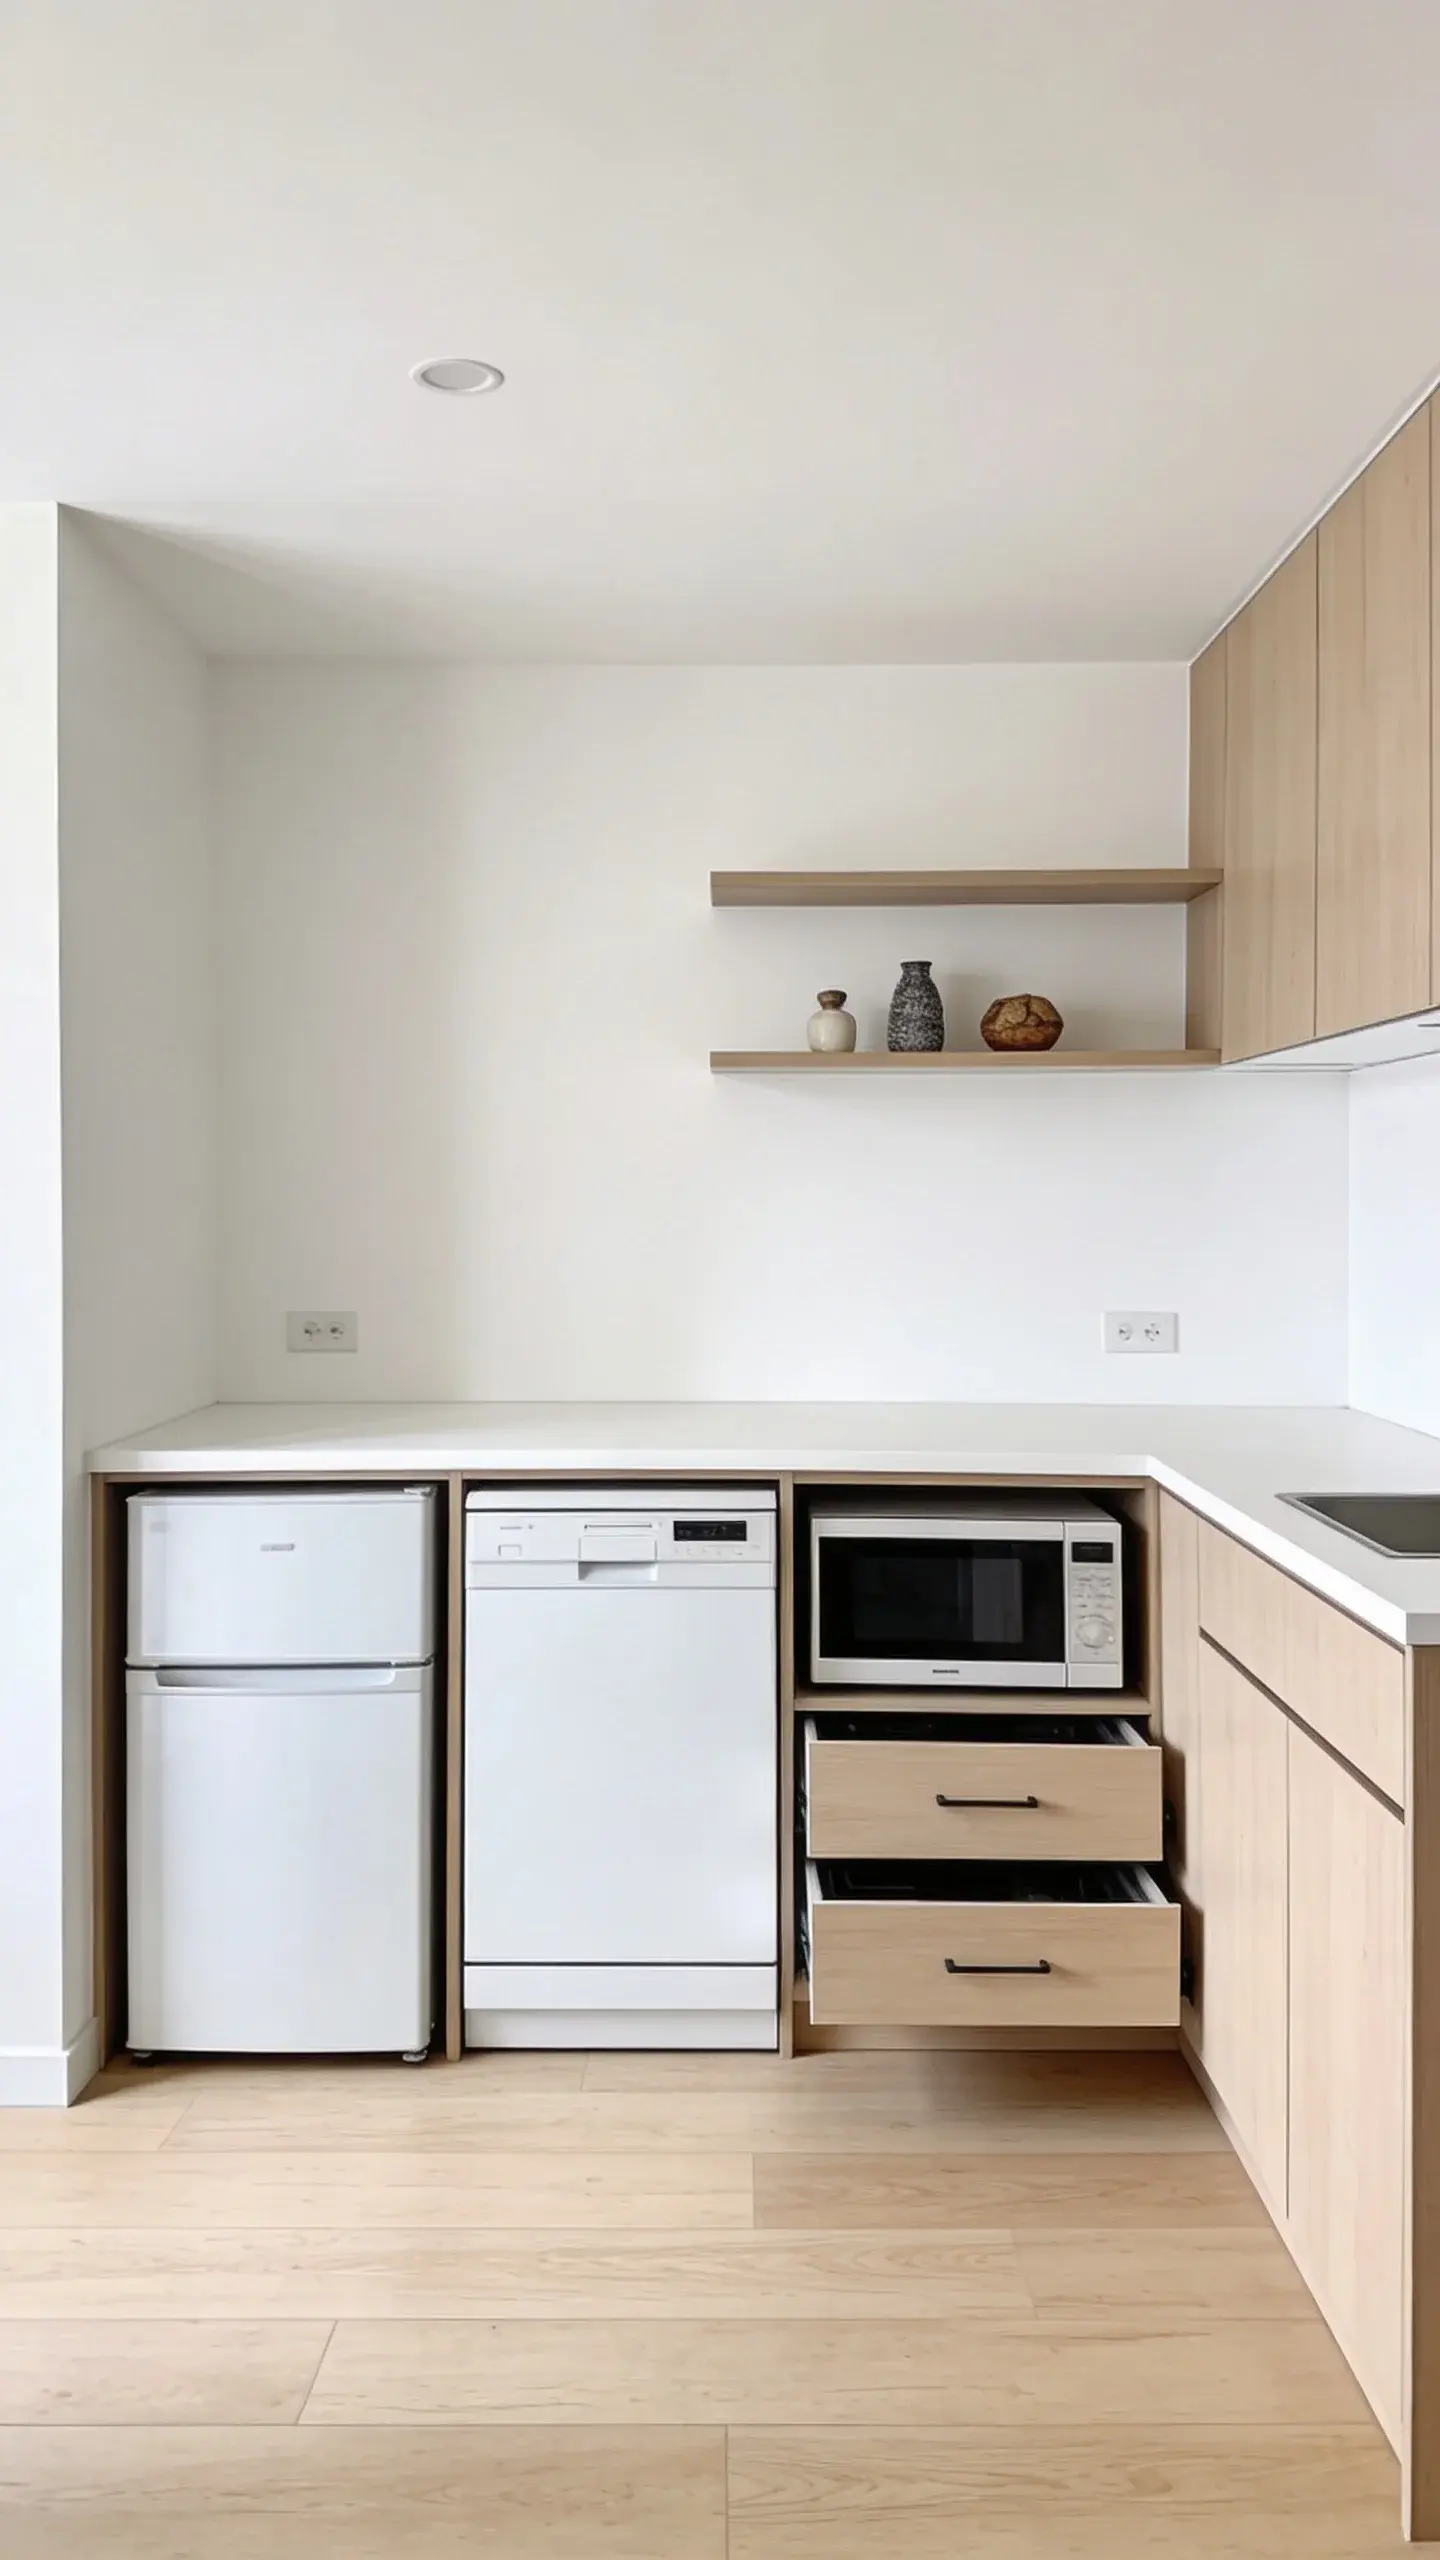
Go low and maximize your floor-to-ceiling space by tucking everything under the counter. This design uses under-counter appliances, deep drawers instead of cabinets, and keeps the upper walls completely clear for an open, breathable feel.
Install an under-counter fridge, drawer-style dishwasher, and even a low-profile microwave drawer. Replace upper cabinets with just one or two floating shelves for display. The countertop becomes your main work surface, and you’ll appreciate the uncluttered sightlines that make your studio feel larger.
Space-Saving Appliances:
- 24-inch under-counter refrigerator
- Two-drawer dishwasher system
- Microwave drawer or countertop convection oven
- Deep pull-out drawers with divider systems
Great for anyone who wants their kitchen to feel less kitchen-y and more like sleek, integrated living. The clean upper wall space is chef’s kiss.
7. Fold-Down Murphy Kitchen Concept
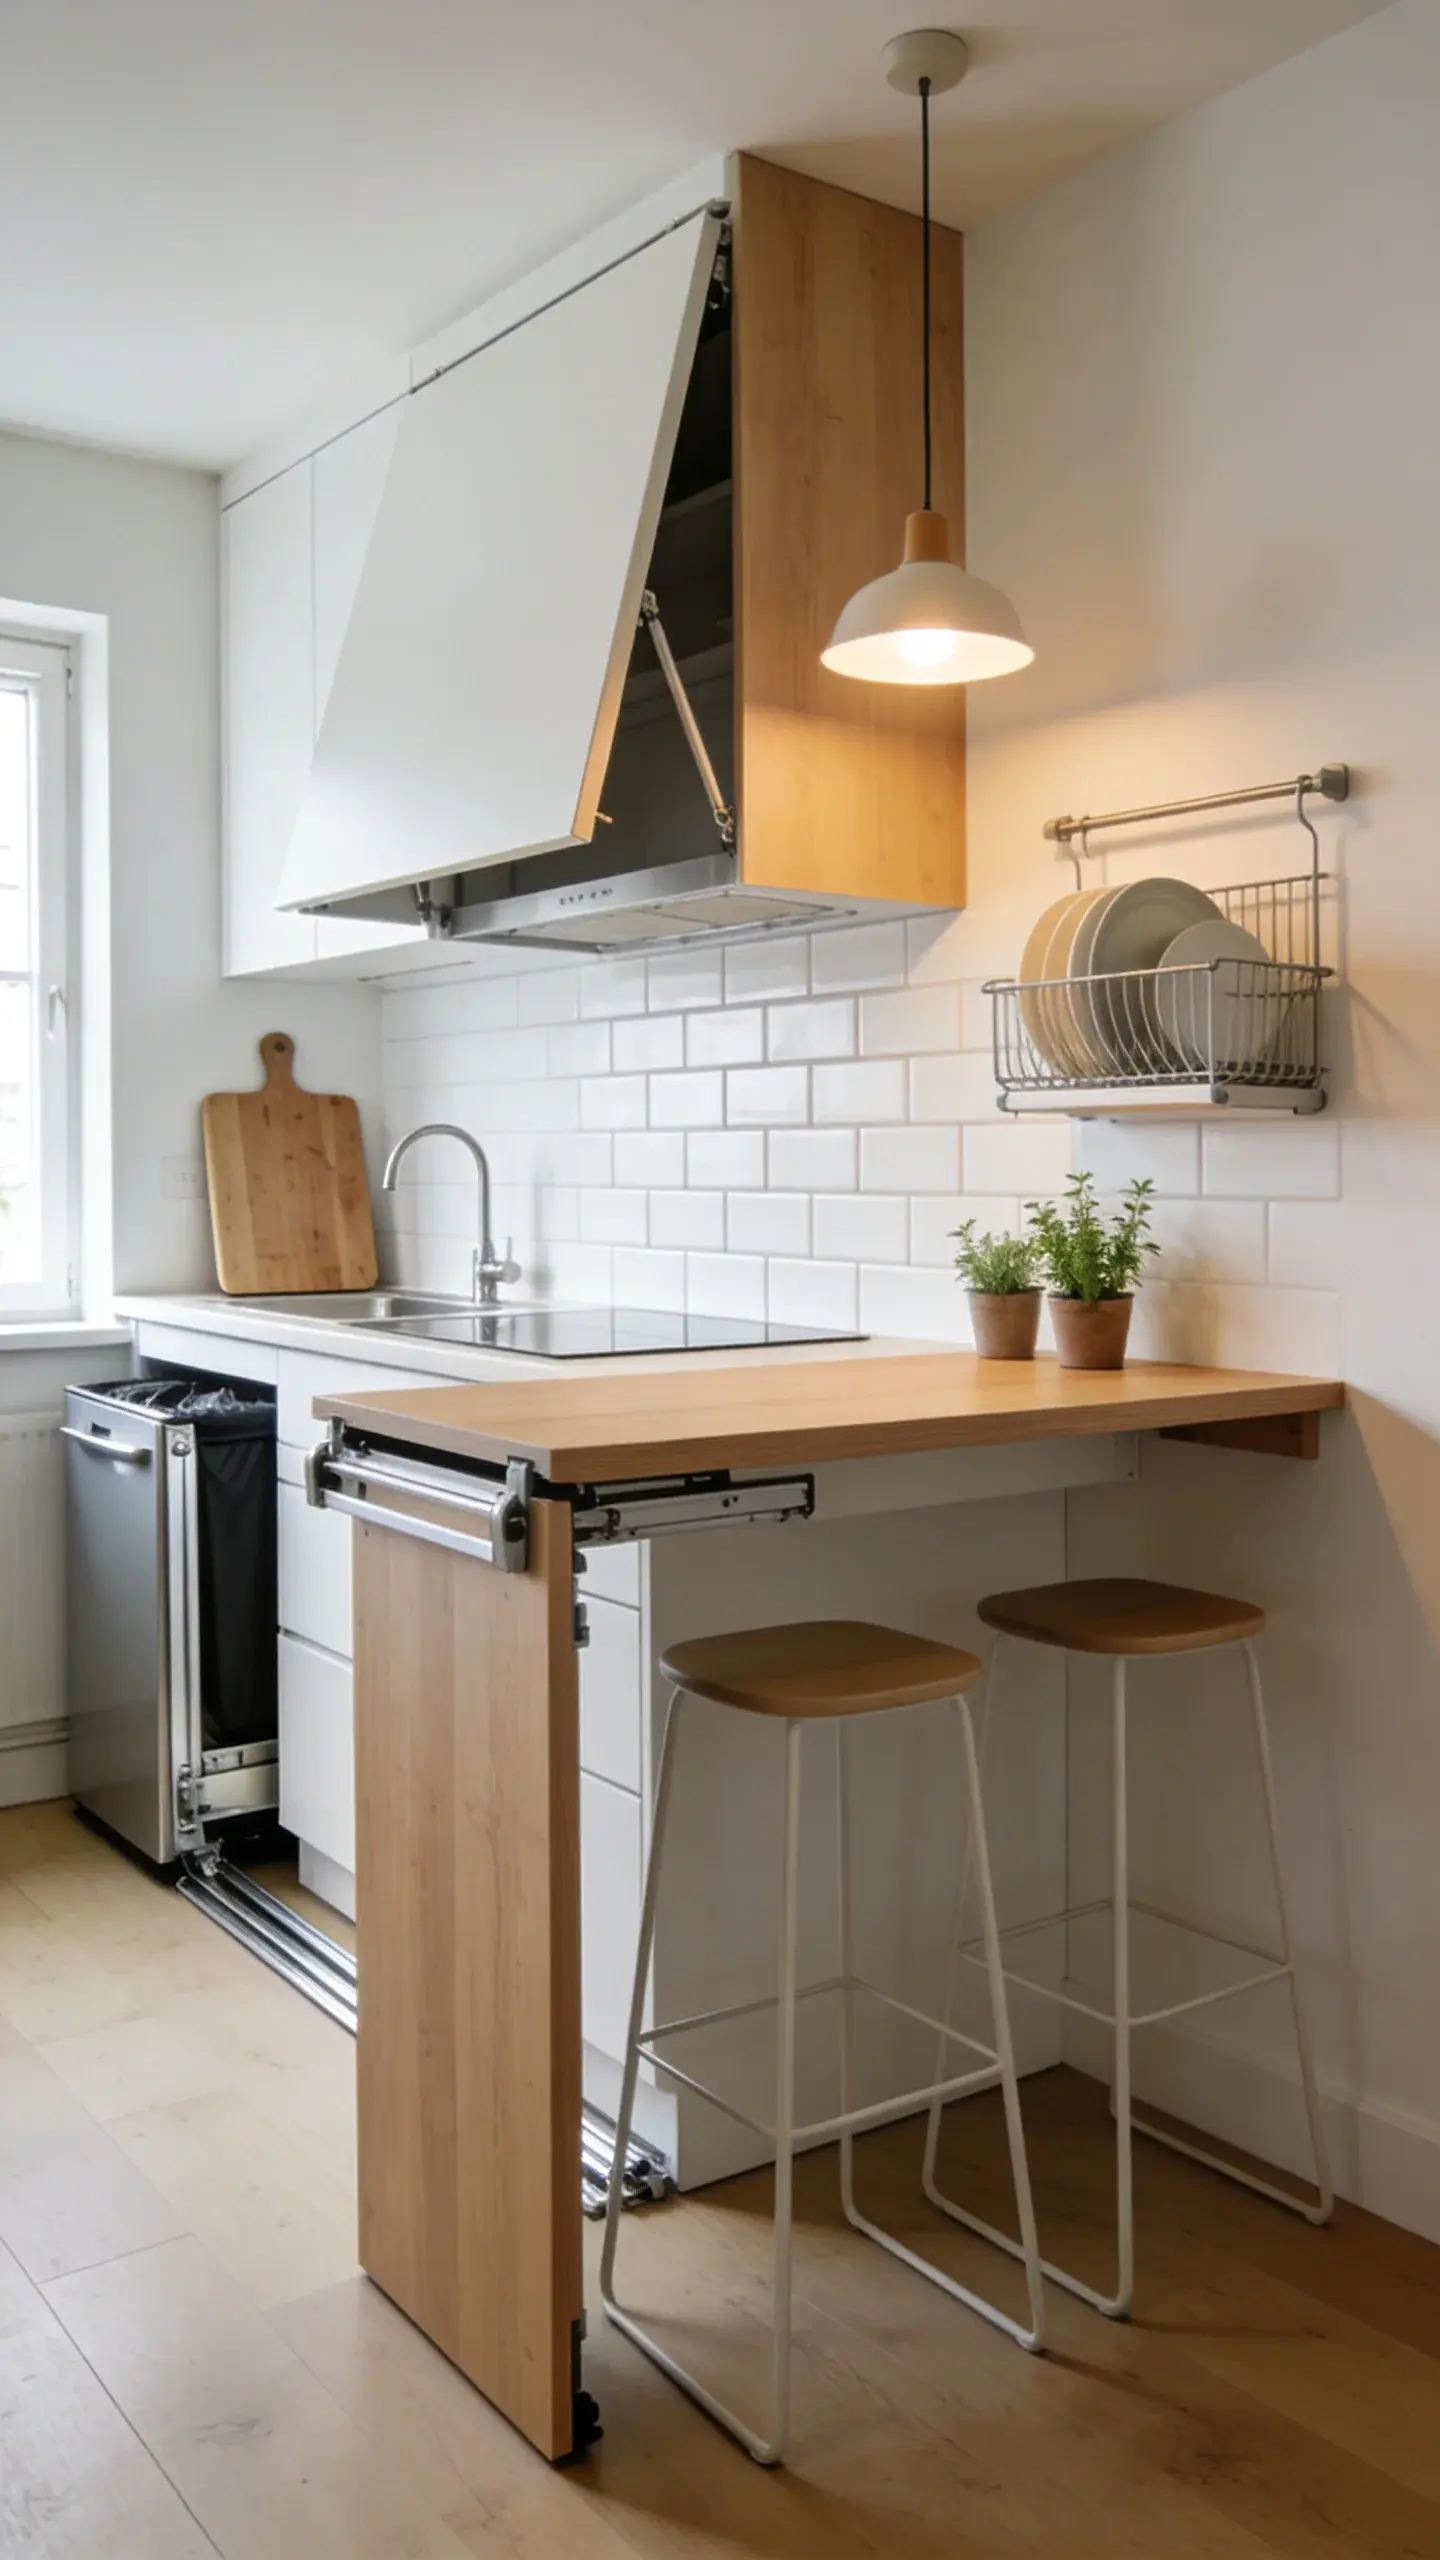
Take inspiration from Murphy beds and create a kitchen that literally folds away. Custom fold-down countertops, hinged tables, and drop-down cutting boards give you work space only when you need it.
Install a wall-mounted fold-down table that serves as your main prep area and eating surface. Add a hinged cutting board that flips up from the counter when needed. Mount a fold-down dish rack that tucks against the backsplash. Even your trash can pull out from a slim cabinet on tracks.
When you’re done cooking, everything folds, flips, or slides back into place, giving you maximum floor space back. This design requires some DIY skills or a handy contractor, but the payoff is incredible for micro studios.
8. Two-Tone Cabinet Drama
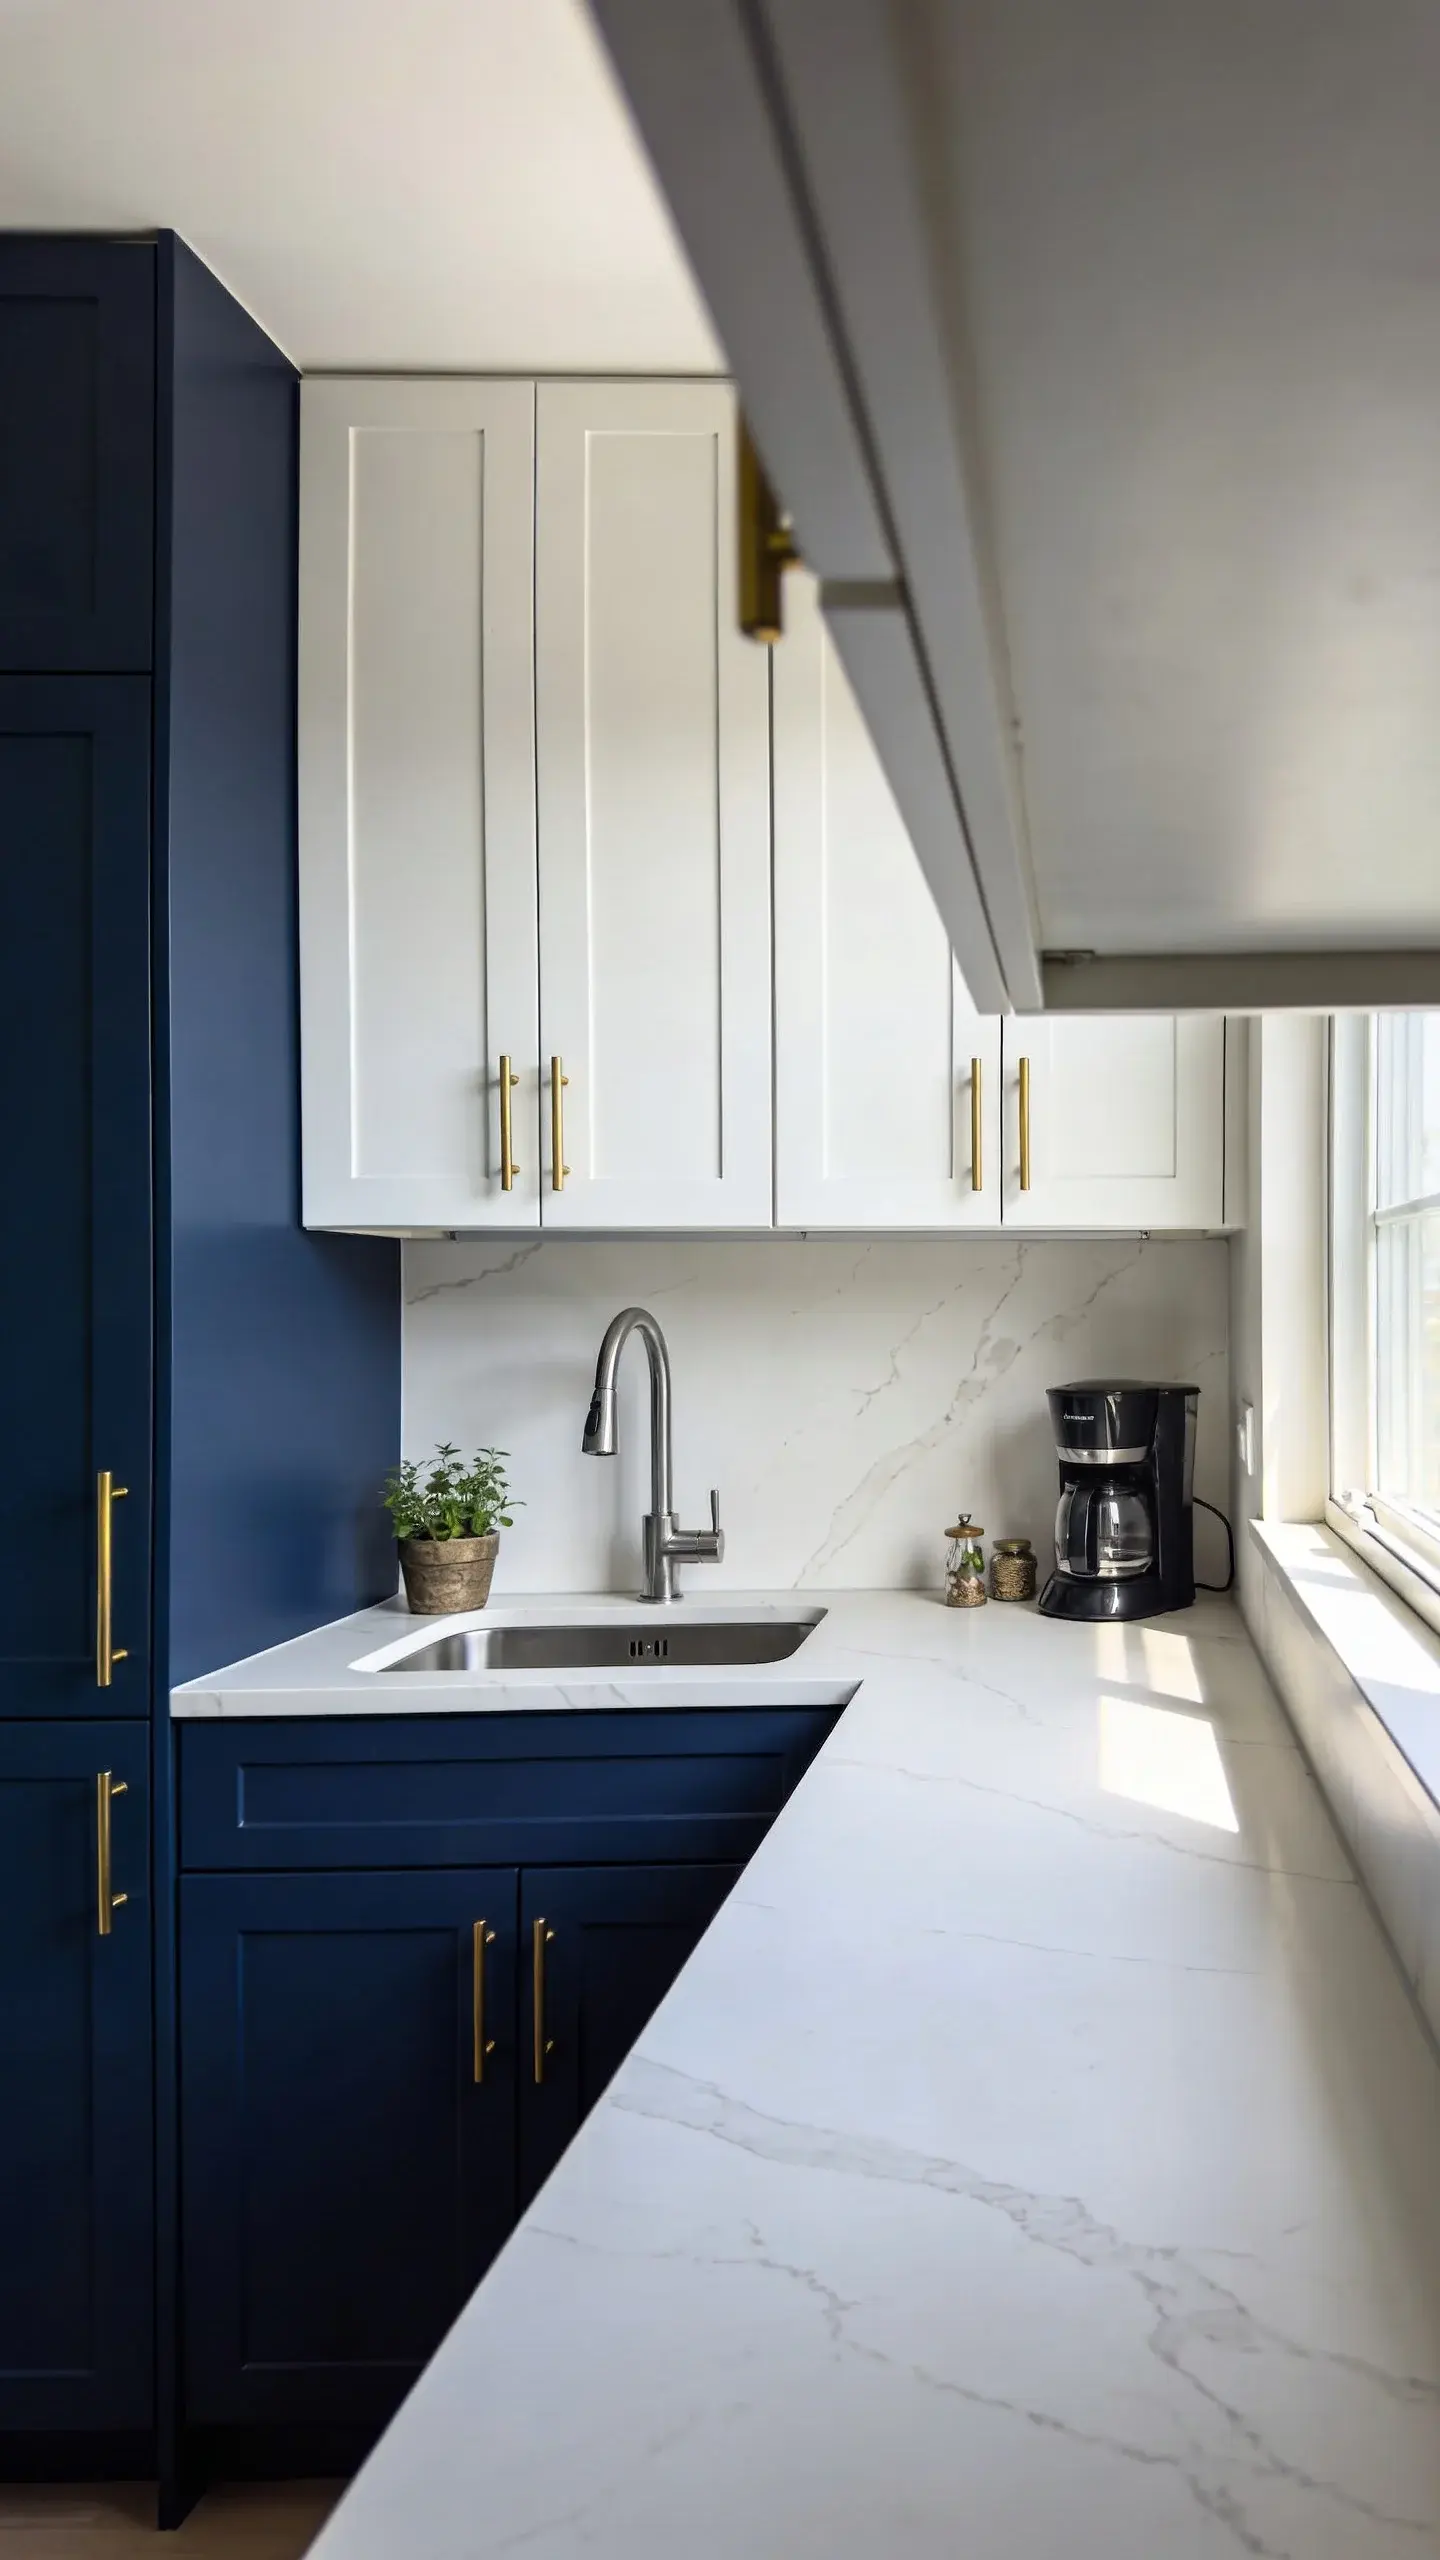
Create visual separation and personality with two-toned cabinetry that makes your small kitchen feel intentionally designed. The contrast draws the eye and adds depth without needing actual square footage.
Paint lower cabinets in a deep navy, forest green, or charcoal gray while keeping upper cabinets (if you have them) in crisp white or soft cream. Or flip it—dark uppers, light lowers. Add brass or matte black hardware that pops against both colors. Choose a white quartz or marble-look countertop to tie everything together.
Winning Color Combos:
- Navy blue lowers + white uppers + brass hardware
- Sage green lowers + cream uppers + black hardware
- Charcoal gray lowers + light oak uppers + brushed nickel
- Blush pink lowers + white uppers + gold hardware
This approach works for anyone tired of boring all-white kitchens but nervous about going full-color. It’s the perfect compromise with major impact.
9. Rolling Cart Central Command
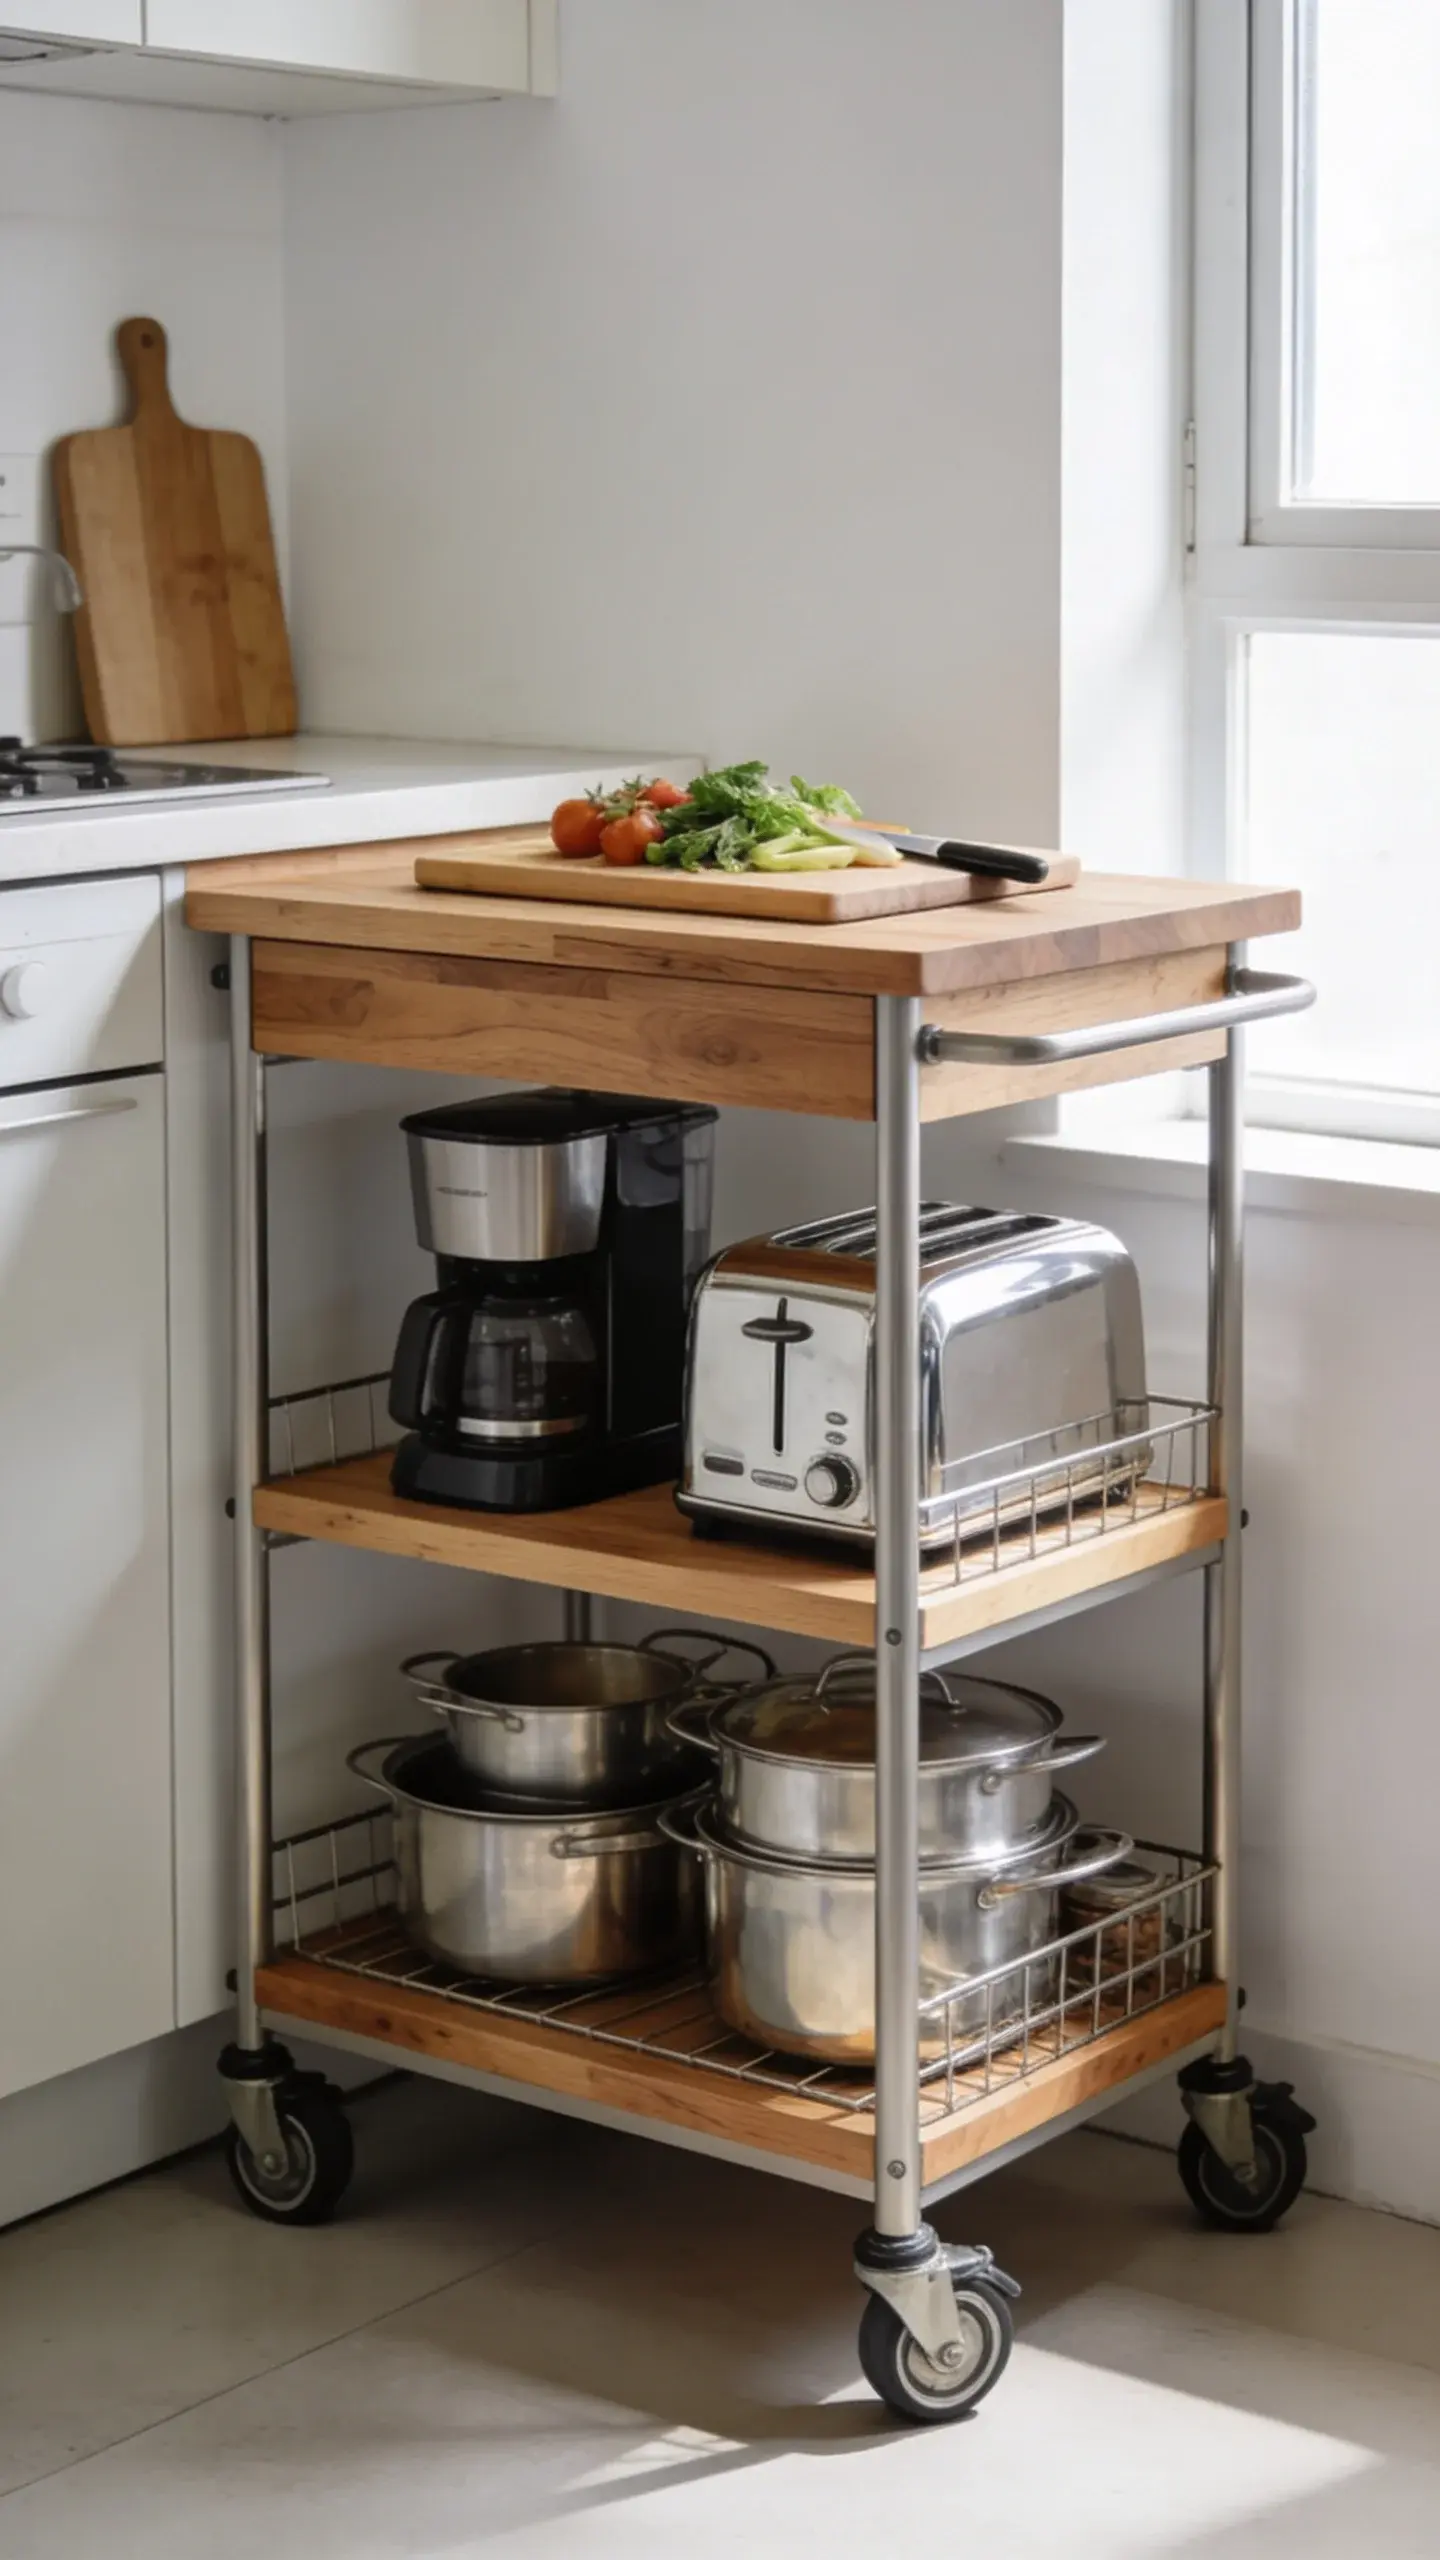
Make a rolling kitchen cart your kitchen’s MVP. This mobile solution gives you extra counter space, storage, and flexibility to move things around as your needs change throughout the day.
Invest in a high-quality butcher block cart or stainless steel rolling island with multiple shelves and drawers. Use the top for prep work, the middle shelves for appliances you use daily (toaster, coffee maker), and the bottom for pots and pans. When you need more floor space for yoga or guests, just roll it against the wall or into a closet.
Cart Features to Look For:
- Locking wheels for stability during food prep
- Solid wood or stainless steel top surface
- At least two shelves plus a drawer
- Towel bar or hooks on the side
Bonus: you can take this with you when you move. Perfect for renters who want flexibility without permanent installations.
10. Corner Kitchen Optimization
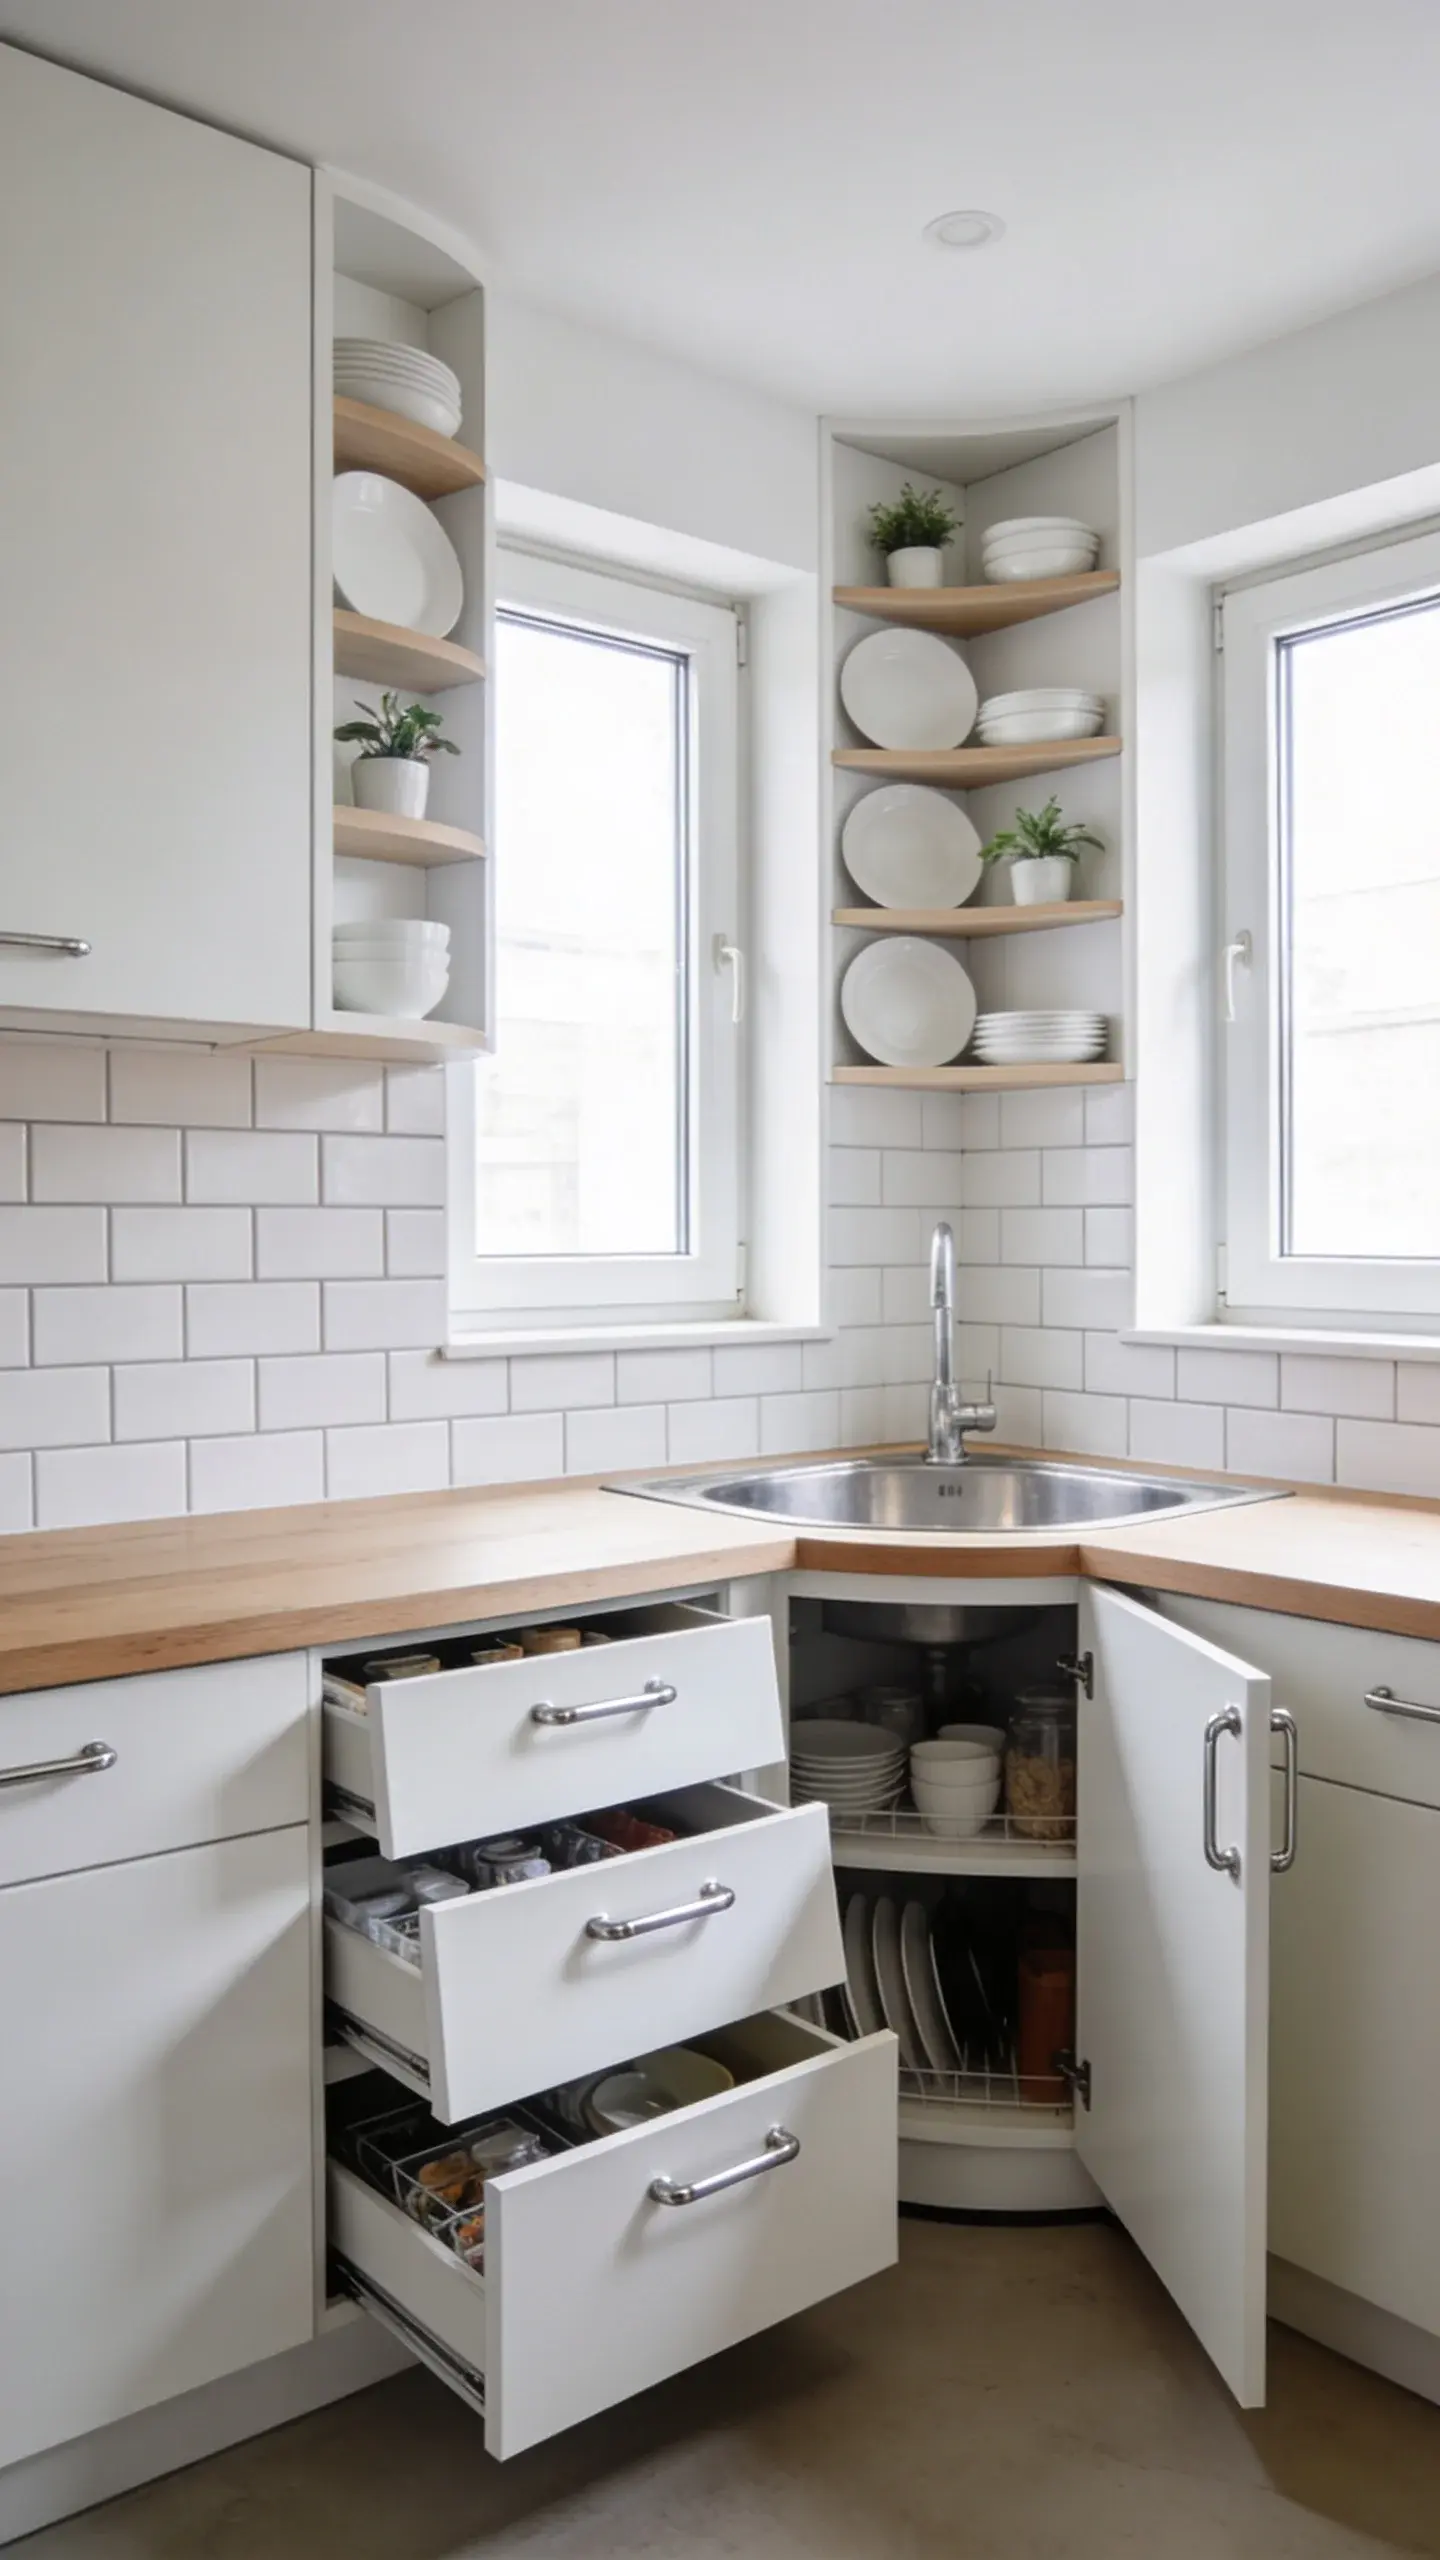
Turn that awkward corner into your kitchen’s hardest-working zone. L-shaped layouts with corner sink installations and lazy Susan cabinets make every inch count.
Install your sink in the corner with windows on both sides if possible—it creates a bright focal point and makes washing dishes less tedious. Use corner drawers (yes, they exist and they’re magical) that pull out at an angle, giving you access to that typically dead space. Add a corner shelf unit that wraps around both walls for vertical storage that doesn’t protrude into your living area.
Corner solutions might seem tricky to install, but they unlock serious storage potential that standard straight-line kitchens can’t match. Your studio will thank you.
11. Mirrored Backsplash Illusion
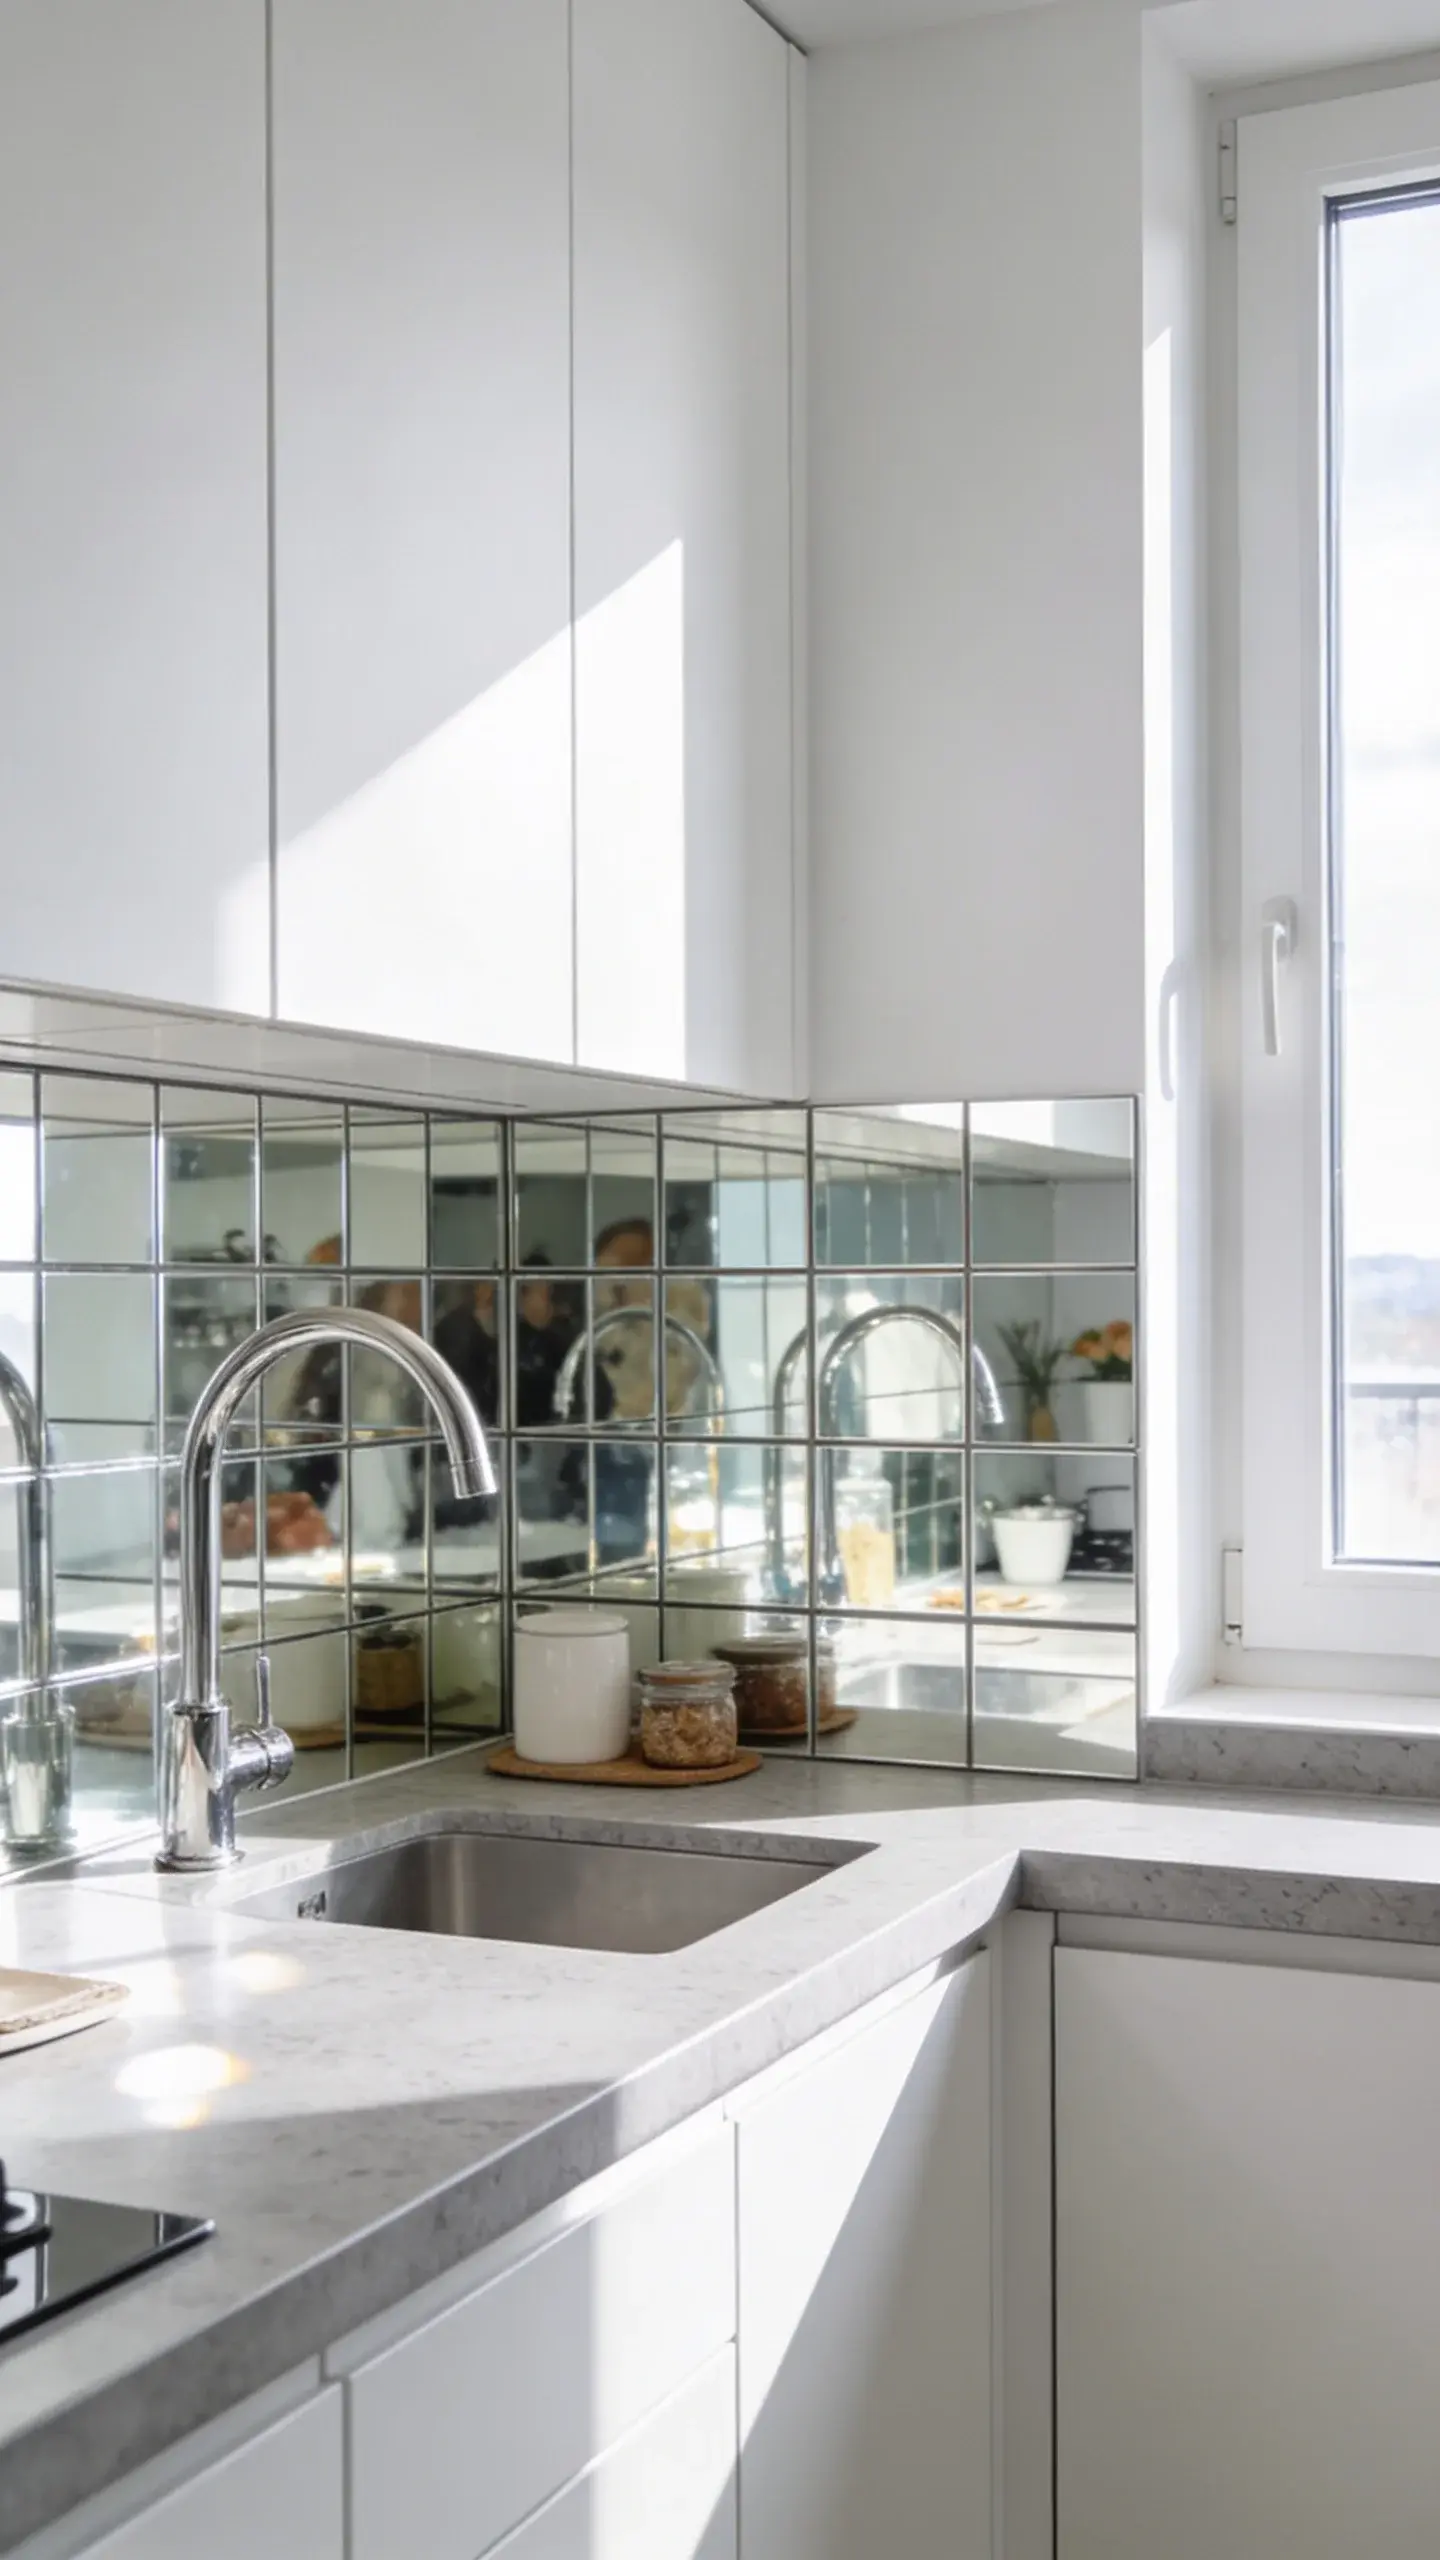
Create the illusion of double the space with a mirrored backsplash that reflects light and visually expands your kitchen. It’s like adding a window where none exists.
Install antique mirror tiles or sleek modern mirror panels as your backsplash instead of standard tile. The reflection bounces natural light around the space and makes your kitchen feel open and airy. Keep the rest of the design simple—let the mirrors do the heavy lifting. Choose white or light gray cabinets and minimal countertop clutter so the reflections stay clean and bright.
Mirror Options:
- Antiqued mirror tiles for vintage charm
- Seamless mirror panels for modern sleekness
- Beveled mirror subway tiles for traditional style
- Smoked mirror for subtle drama
Fair warning: this means keeping your backsplash area clean becomes non-negotiable. But if you can handle that, the spatial impact is worth it.
12. Monochrome Black Statement Kitchen
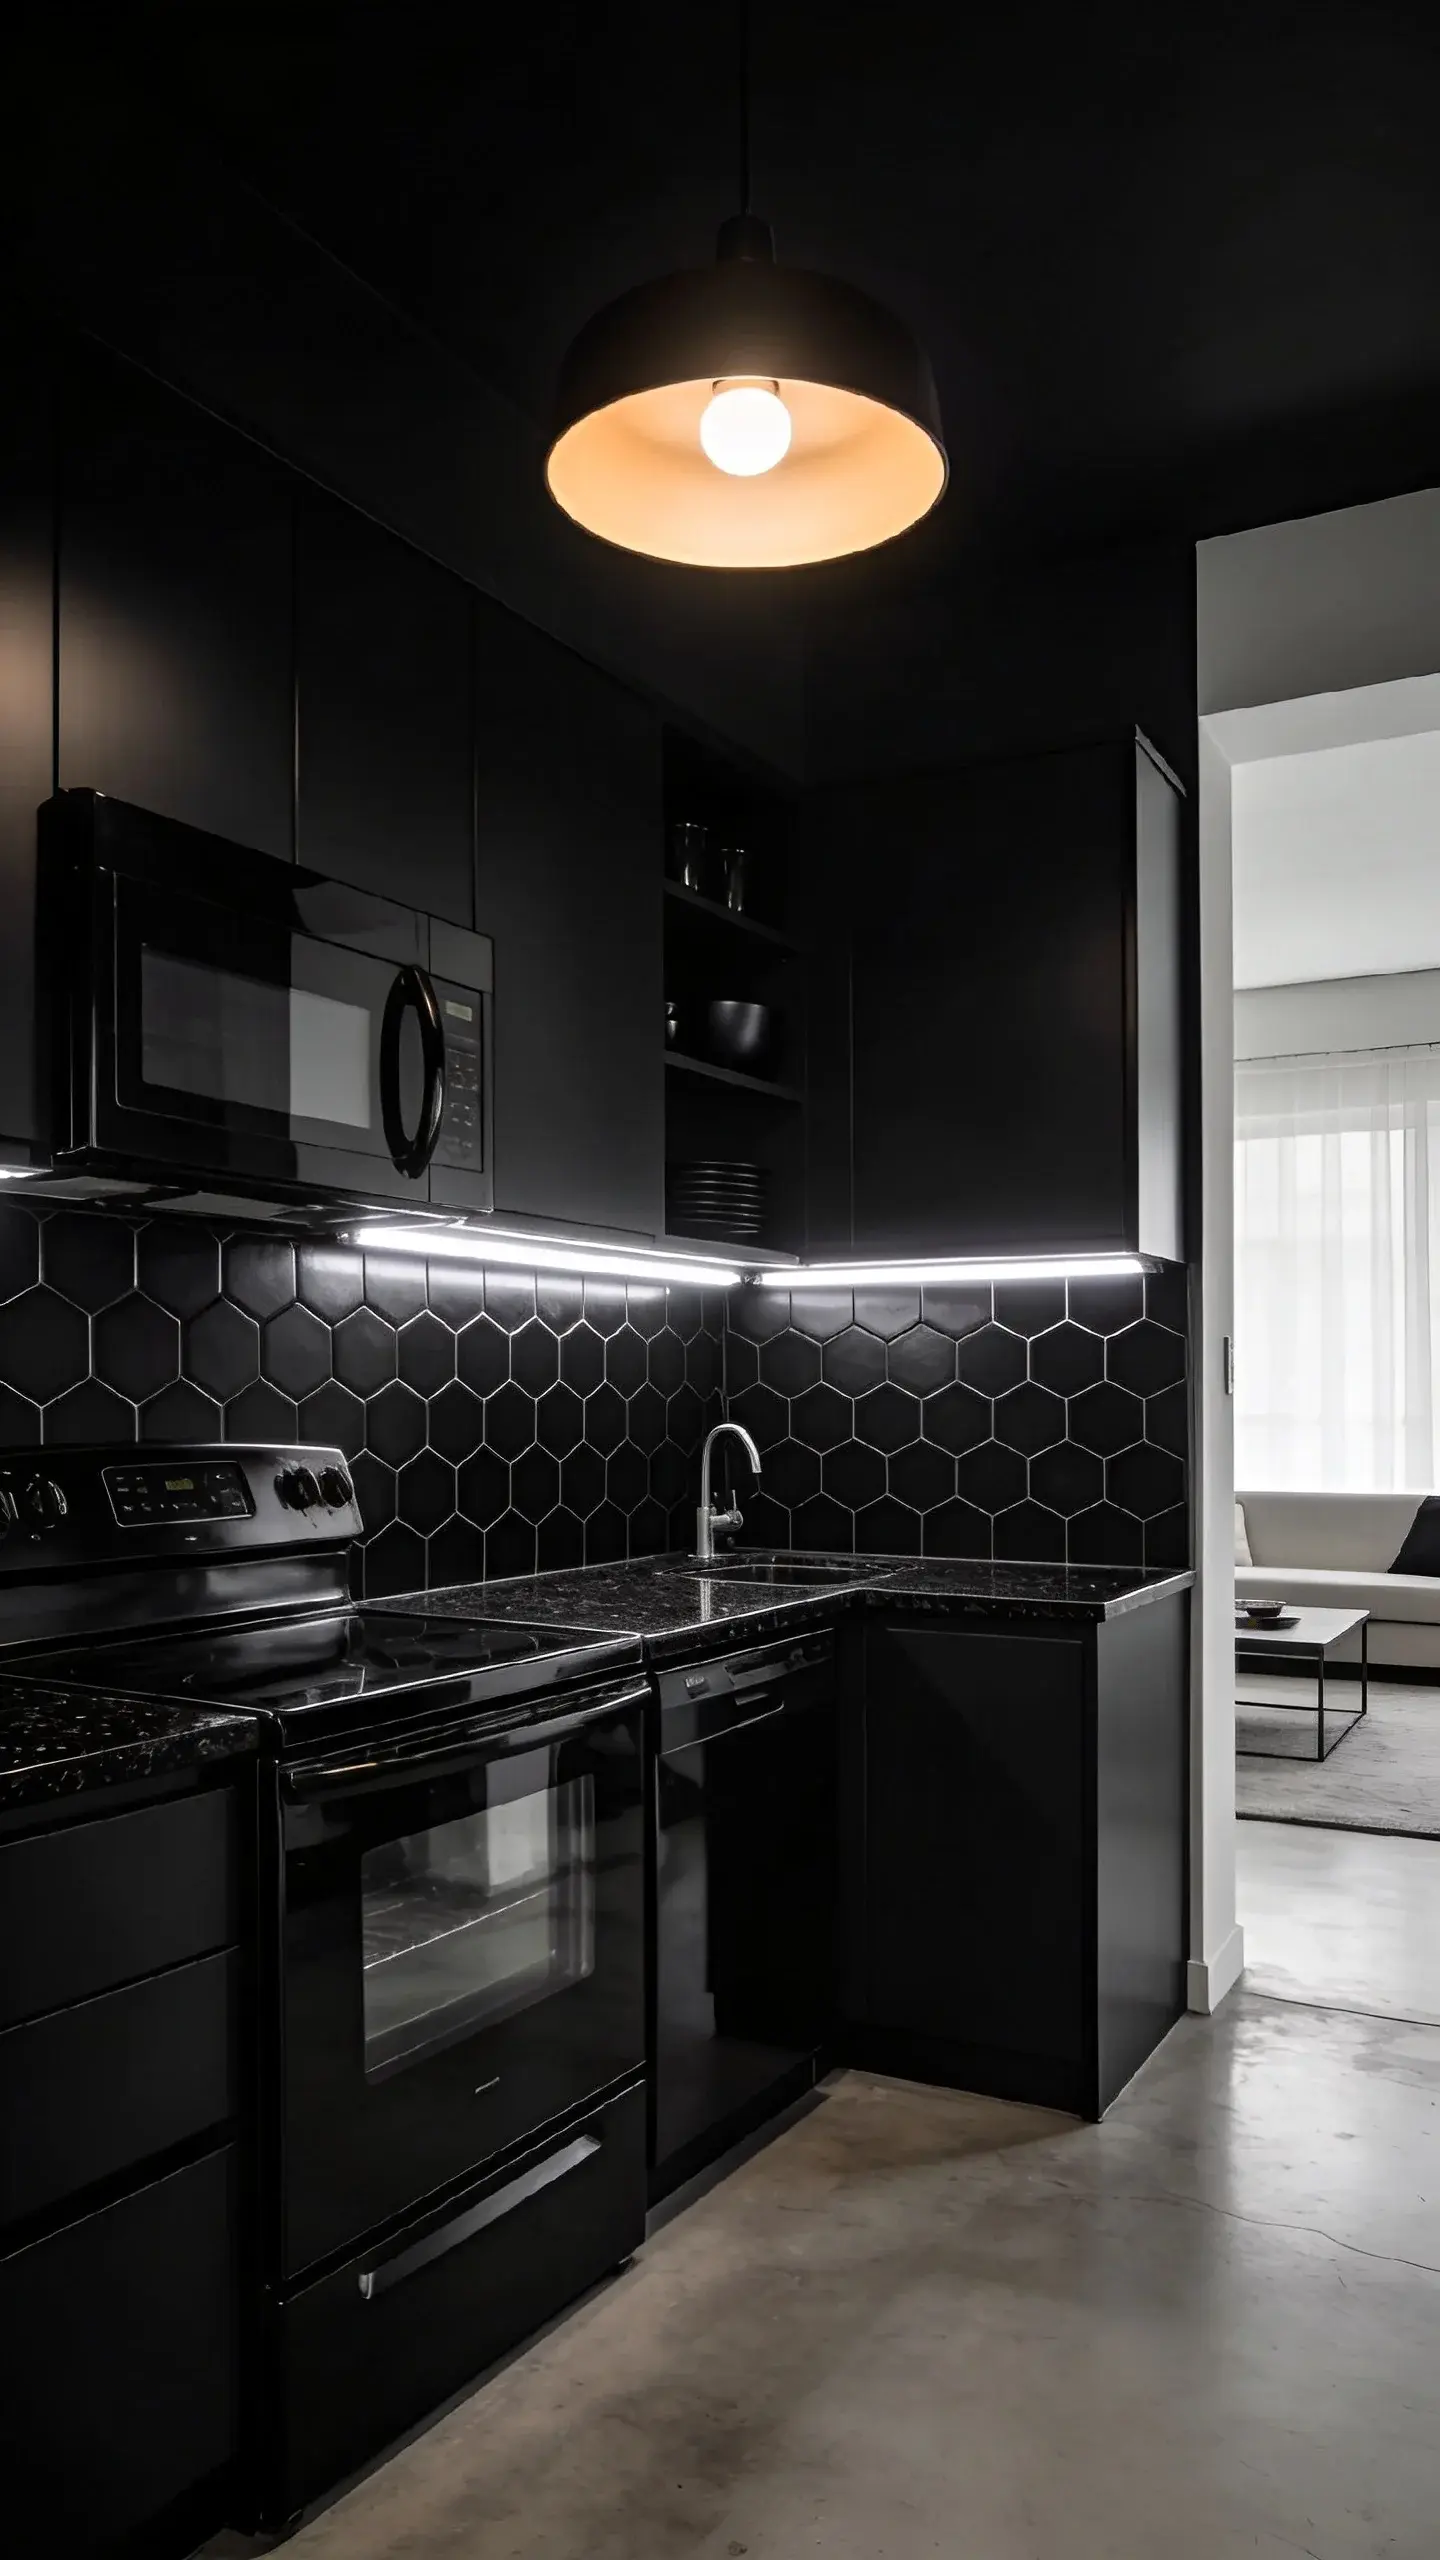
Go bold with an all-black kitchen that feels sophisticated and makes your studio’s other areas pop by comparison. Dark colors actually recede visually, making the kitchen feel like its own defined zone.
Paint cabinets in matte black, choose black stainless steel appliances, and install a black granite or soapstone countertop. Add black subway tiles or a black hexagon backsplash. The key to making this work without feeling cave-like? Excellent lighting—think bright under-cabinet LEDs and a statement pendant light in brass or clear glass.
Balancing the Darkness:
- Warm wood open shelving for contrast
- Brass or gold hardware and fixtures
- Bright white dishware displayed on shelves
- Multiple light sources at different heights
This look isn’t for the faint of heart, but it makes a serious statement. IMO, it works best in studios with great natural light to balance the moody vibes.
13. Open Shelving with Curtain Concealment
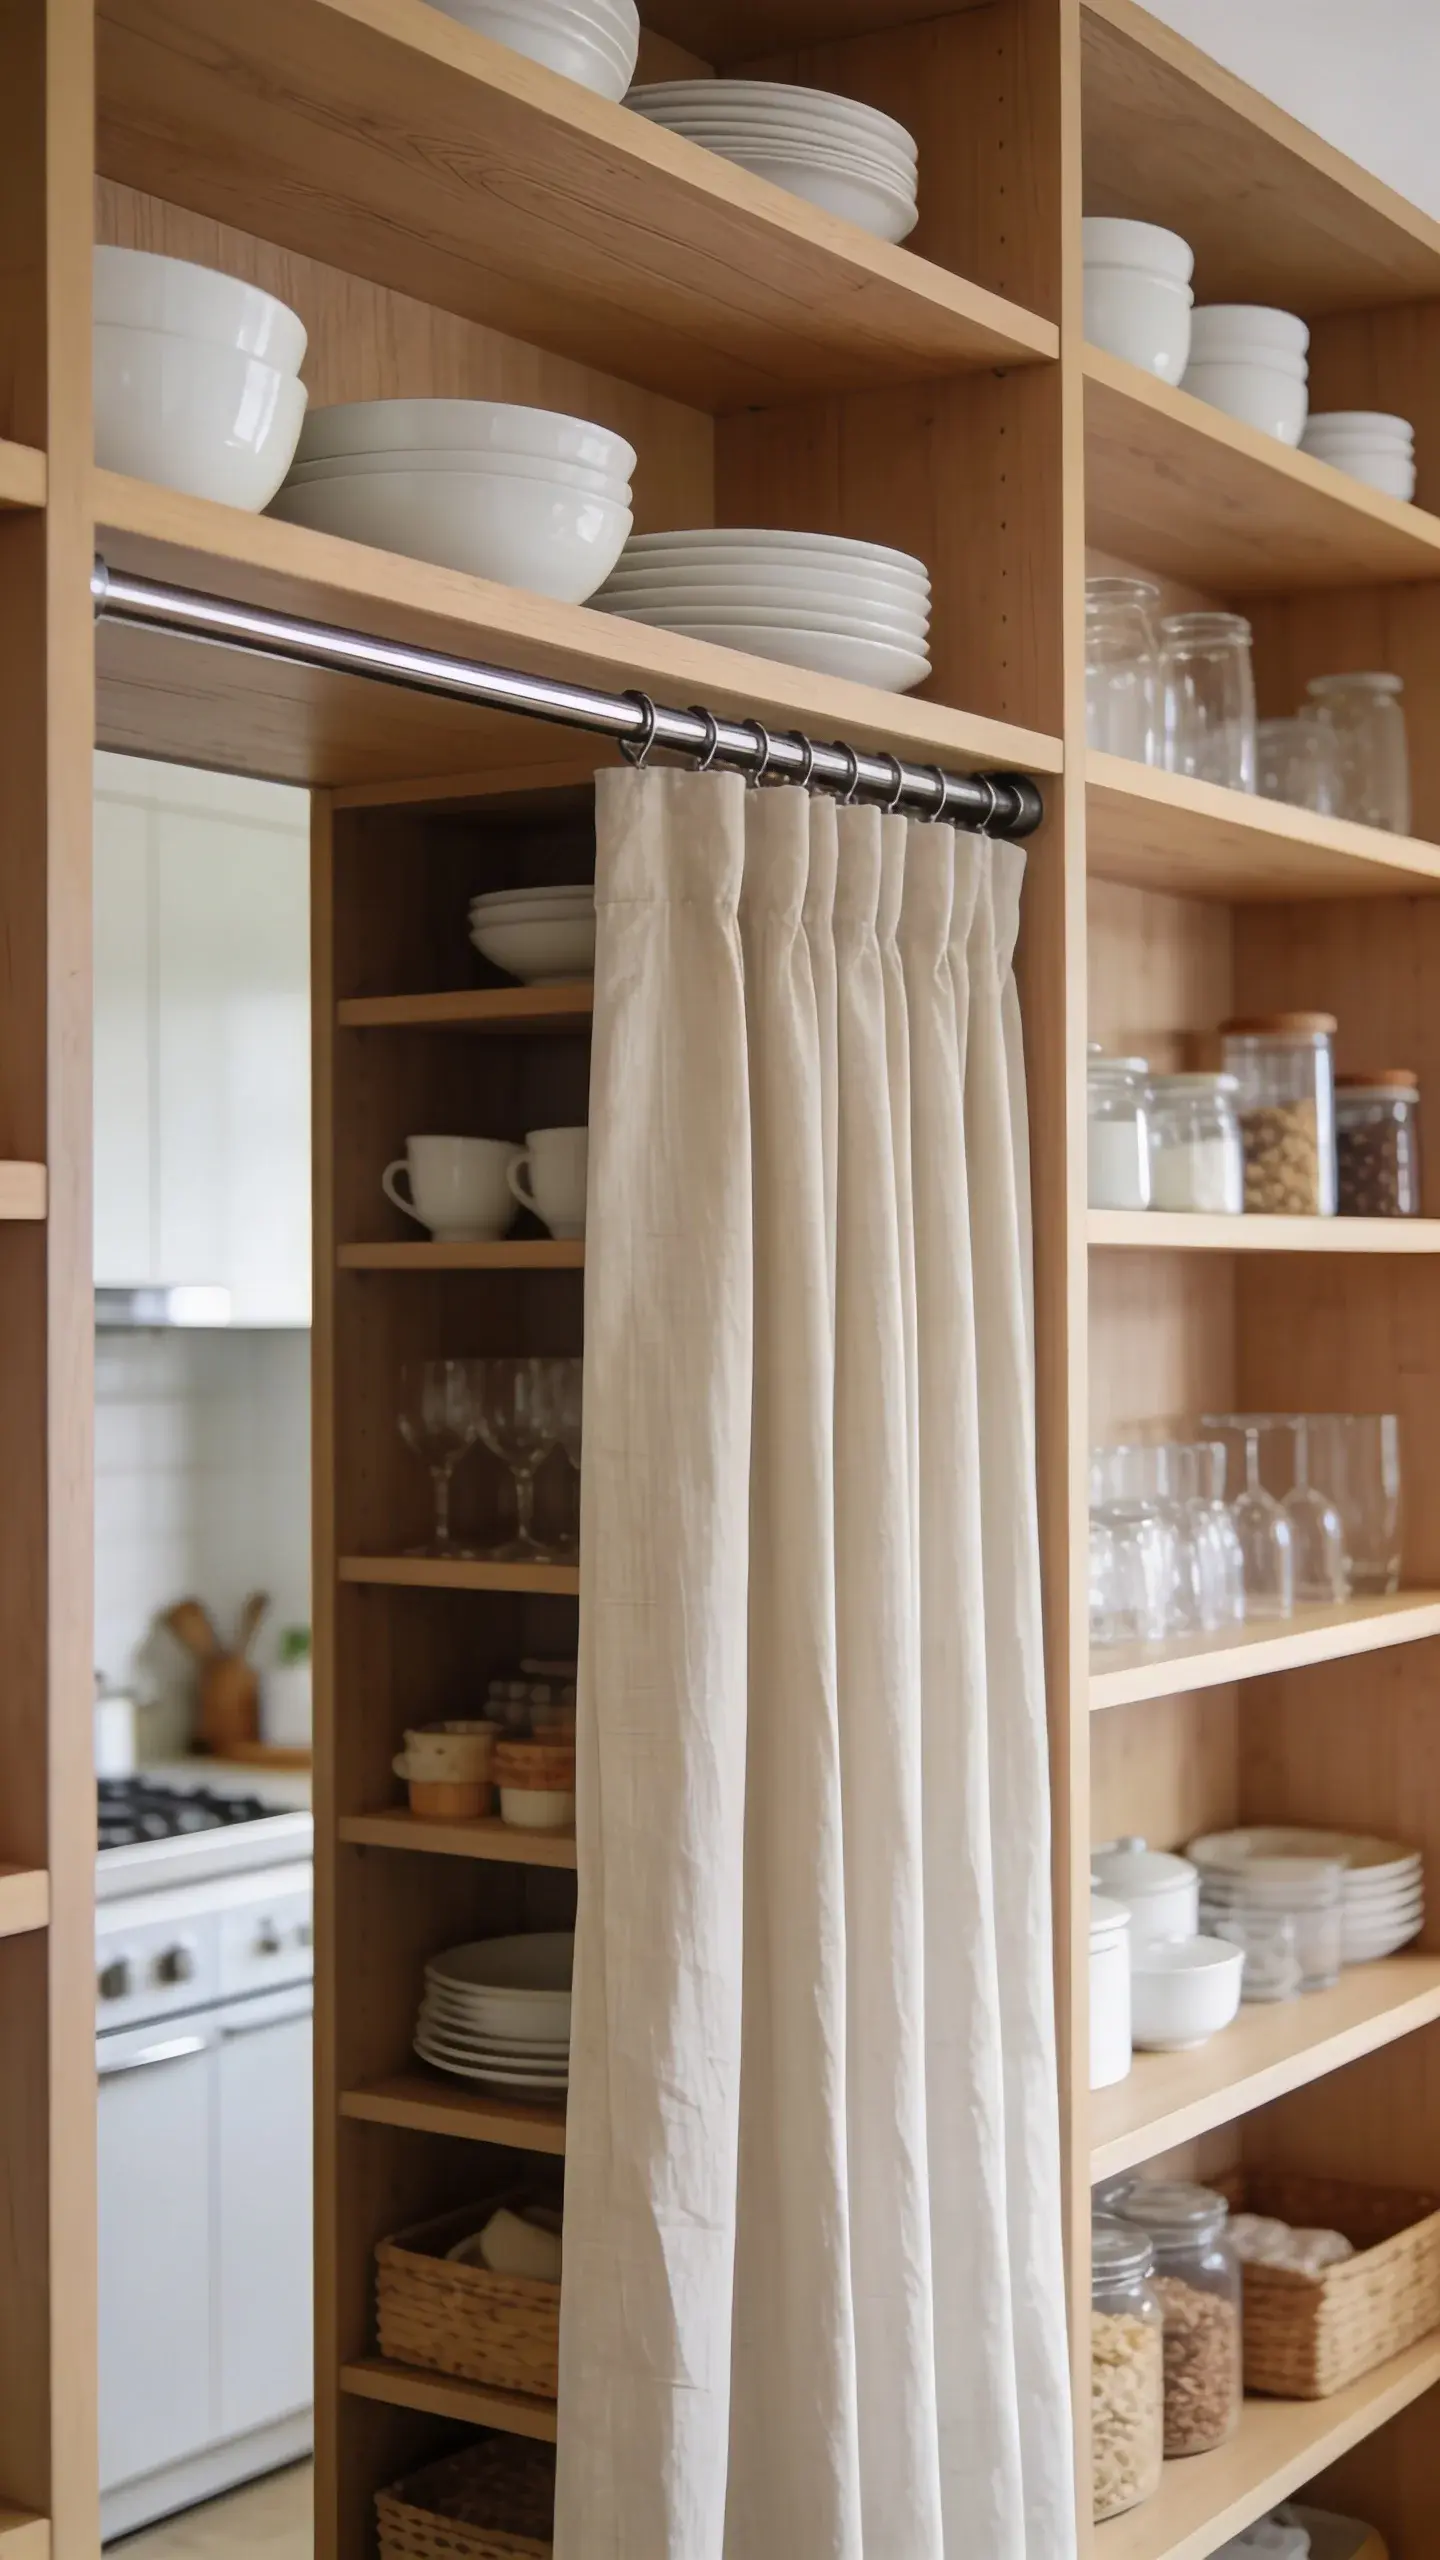
Get the affordability and accessibility of open shelving but add curtains on rods that hide the chaos when needed. It’s the best of both worlds—functional access plus the ability to conceal clutter instantly.
Install simple wooden or metal open shelves for all your dishes, glasses, and pantry items. Mount a tension rod or curtain track in front of the shelving. Use linen curtains in a neutral color or a fun pattern that complements your studio’s decor. When you’re cooking, pull the curtains back. When you’re entertaining or just tired of looking at your stuff, close them for a cleaner look.
This solution costs a fraction of what cabinet doors would run you, and you can change the curtain fabric with the seasons. Plus, it’s perfect for renters who can’t modify existing shelving.
14. Galley Kitchen Color Block

If you’ve got a narrow galley-style kitchen, embrace it with bold color blocking that draws the eye through the space rather than emphasizing the tight quarters. One wall in a saturated color creates depth and personality.
Paint one full wall (including any cabinets on it) in a vibrant terracotta, deep teal, or sunny yellow. Keep the opposite wall neutral—white or light gray. The color contrast creates visual interest and actually makes the galley feel wider by giving the eye a focal point. Add patterned floor tiles or a striped runner that emphasizes the length of the space.
Color Wall Ideas:
- Terracotta with white opposite wall and natural wood accents
- Deep teal with cream opposite wall and brass fixtures
- Sunny yellow with soft gray opposite wall